Weed control in a bioswale is not mainly about appearance. Dense weeds can crowd out intended plants, trap sediment near an inlet, restrict visible inspection points, and change how stormwater runoff moves across the surface. Safe maintenance removes unwanted growth while protecting soil structure, plant roots, mulch, drainage components, and the flow path.
The best approach combines early identification, careful hand removal, healthy plant cover, mulch management, and routine inspection. Herbicides may have a limited role on some managed sites, but they require careful product selection, application timing, and protection of nearby water, desirable vegetation, and drainage structures.
Why Weeds Matter in a Bioswale
A bioswale depends on vegetation and soil working together. Roots help hold the surface, support infiltration, and reduce erosion. Stems and leaves slow shallow runoff and help settle suspended sediment. Unwanted plants can interfere with those functions when they become dense, woody, invasive, or poorly suited to wet-and-dry conditions.
Not every volunteer plant is harmful. Some may provide useful cover without blocking flow or displacing the intended planting. The maintenance question is whether the plant supports the designed vegetation pattern and drainage function—not simply whether it appeared without being planted.
| Observed Condition | Possible Effect | Typical Response |
|---|---|---|
| Young scattered weeds | Early competition with establishing plants | Hand-pull while soil is moist and remove the full root where practical |
| Dense annual weeds | Seed production and rapid seasonal spread | Remove before flowering or seed set, then restore mulch or plant cover |
| Deep-rooted perennial weeds | Repeated regrowth from roots or underground stems | Loosen carefully, remove as much root material as possible, and monitor regrowth |
| Woody seedlings | Potential obstruction, shading, or damage near structures | Remove while small, especially near inlets, outlets, underdrain cleanouts, and check dams |
| Aggressive spreading plants | Displacement of designed grasses, sedges, rushes, or shrubs | Contain or remove promptly and verify local invasive-plant guidance |
| Bare soil after weeding | Erosion, crusting, and new weed germination | Replant, repair mulch, and stabilize the surface without compacting it |
Identify the Plant Before Removing It
Misidentification is a common maintenance mistake. Young native grasses, sedges, rushes, and flowering perennials may look similar to unwanted plants during early growth. Removing them can leave open soil and weaken the planting plan.
Use the original planting list, site plan, seasonal photographs, plant labels, or a local plant identification resource. When identity remains uncertain, mark the plant and inspect it again after leaves, stems, flowers, or seed heads develop.
Maintenance Note: Distinguish between a weed, a volunteer plant, and a failed design plant. A species may be native to the region yet still be unsuitable beside an outlet, within a curb opening, or in a narrow flow path.
Use the Least-Disruptive Removal Method
The safest method is usually the one that removes the weed while causing the least disturbance to the soil media, intended roots, mulch layer, and drainage grade. Large-scale digging can loosen the surface, create depressions, expose filter media, or damage nearby plants.
Hand-Pulling
Hand-pulling works well for small infestations and young plants. Removal is easier after light rain or irrigation, when the root zone is moist but not saturated. Pull close to the plant base with steady pressure rather than jerking the stem.
Avoid walking through ponded or very soft soil. Foot traffic under wet conditions can compact the surface, form ruts, and reduce infiltration in heavily used maintenance routes.
Hand Tools
A narrow weeding tool, hori-hori-style knife, soil fork, or small trowel can loosen taproots and compact root crowns. Keep digging shallow and controlled. Wide excavation is rarely needed for isolated weeds.
After removal, press loose soil back gently around nearby plants. Do not pack the filter media into a hard surface. Repair disturbed mulch without burying plant crowns.
Cutting and Repeated Suppression
Cutting may be useful where pulling would disturb a steep side slope, expose erosion-prone soil, or damage intertwined roots. Repeated cutting before flowering can reduce seed production and gradually weaken some unwanted plants. It may not control species that spread strongly through rhizomes, stolons, bulbs, or deep roots.
Mowing and String Trimming
Broad mowing is suited only to bioswales designed for mowable vegetation. It can damage diverse plantings, scalp side slopes, scatter weed seeds, and hide young shrubs or perennials. String trimmers also risk cutting desirable stems and stripping bark from woody plants.
Where trimming is part of the maintenance plan, keep equipment away from inlet protection, underdrain cleanouts, observation wells, check dams, overflow structures, and exposed erosion-control materials.
Control Weeds Before They Set Seed
Timing often matters more than force. Small weeds are easier to remove, cause less soil disturbance, and have not yet added a new seed crop to the site. Inspections during active growth help maintenance crews catch problems before dense patches form.
- Remove annual weeds before flowers mature into seed.
- Revisit perennial weeds that may regrow from roots or underground stems.
- Inspect after soil disturbance, mulch movement, flooding, construction, or plant replacement.
- Check edges where turf, roadside vegetation, or neighboring beds can spread into the bioswale.
- Bag seed-bearing or invasive material rather than leaving it on the soil surface.
Plants without mature seed can sometimes remain as surface debris where they will dry fully and cannot reroot. Thick stems, rhizomes, bulbs, seed heads, or plants known to spread vegetatively should be removed from the bioswale.
Protect Inlets, Outlets, and the Flow Path
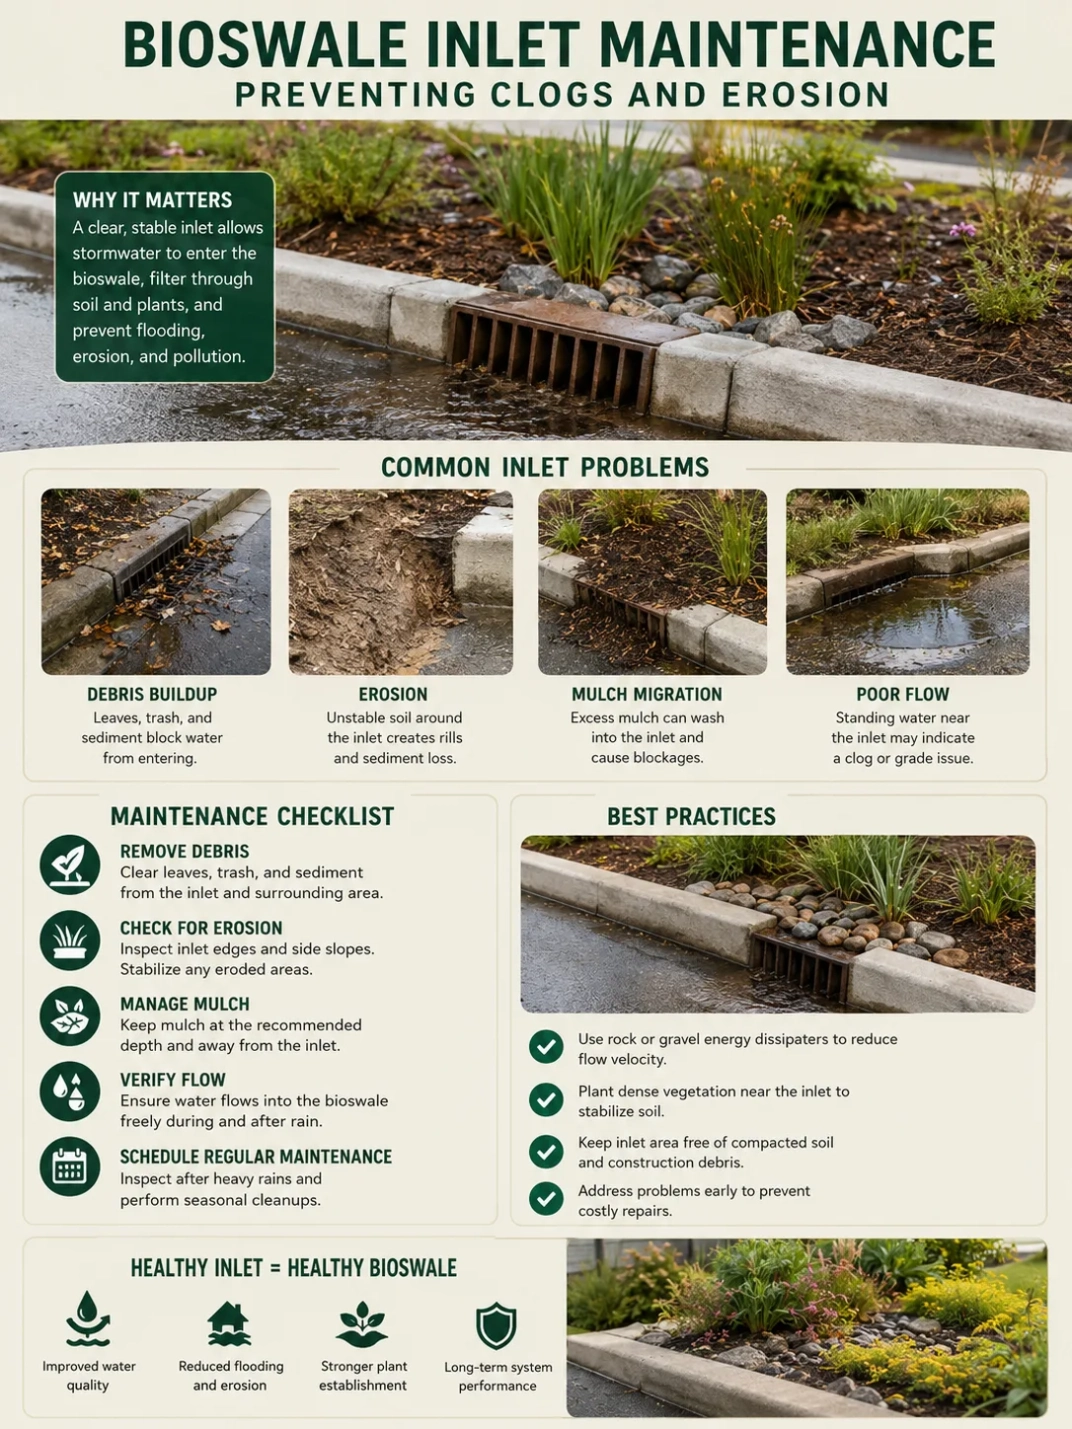
Weed control should preserve the intended movement of water. Dense growth at a curb cut or inlet can collect leaves, litter, and sediment. This may divert runoff around the bioswale or concentrate flow into a narrow channel.
At the outlet, tall weeds can hide erosion, displaced stone, blocked grates, or damaged overflow components. Keep these areas visible enough for inspection while retaining suitable vegetation that stabilizes the soil.
Drainage Note: A clear flow path does not require bare soil. The goal is low, stable, well-rooted vegetation that allows shallow runoff to spread without forming a blocked channel or exposed erosion strip.
Use Mulch Without Creating New Problems
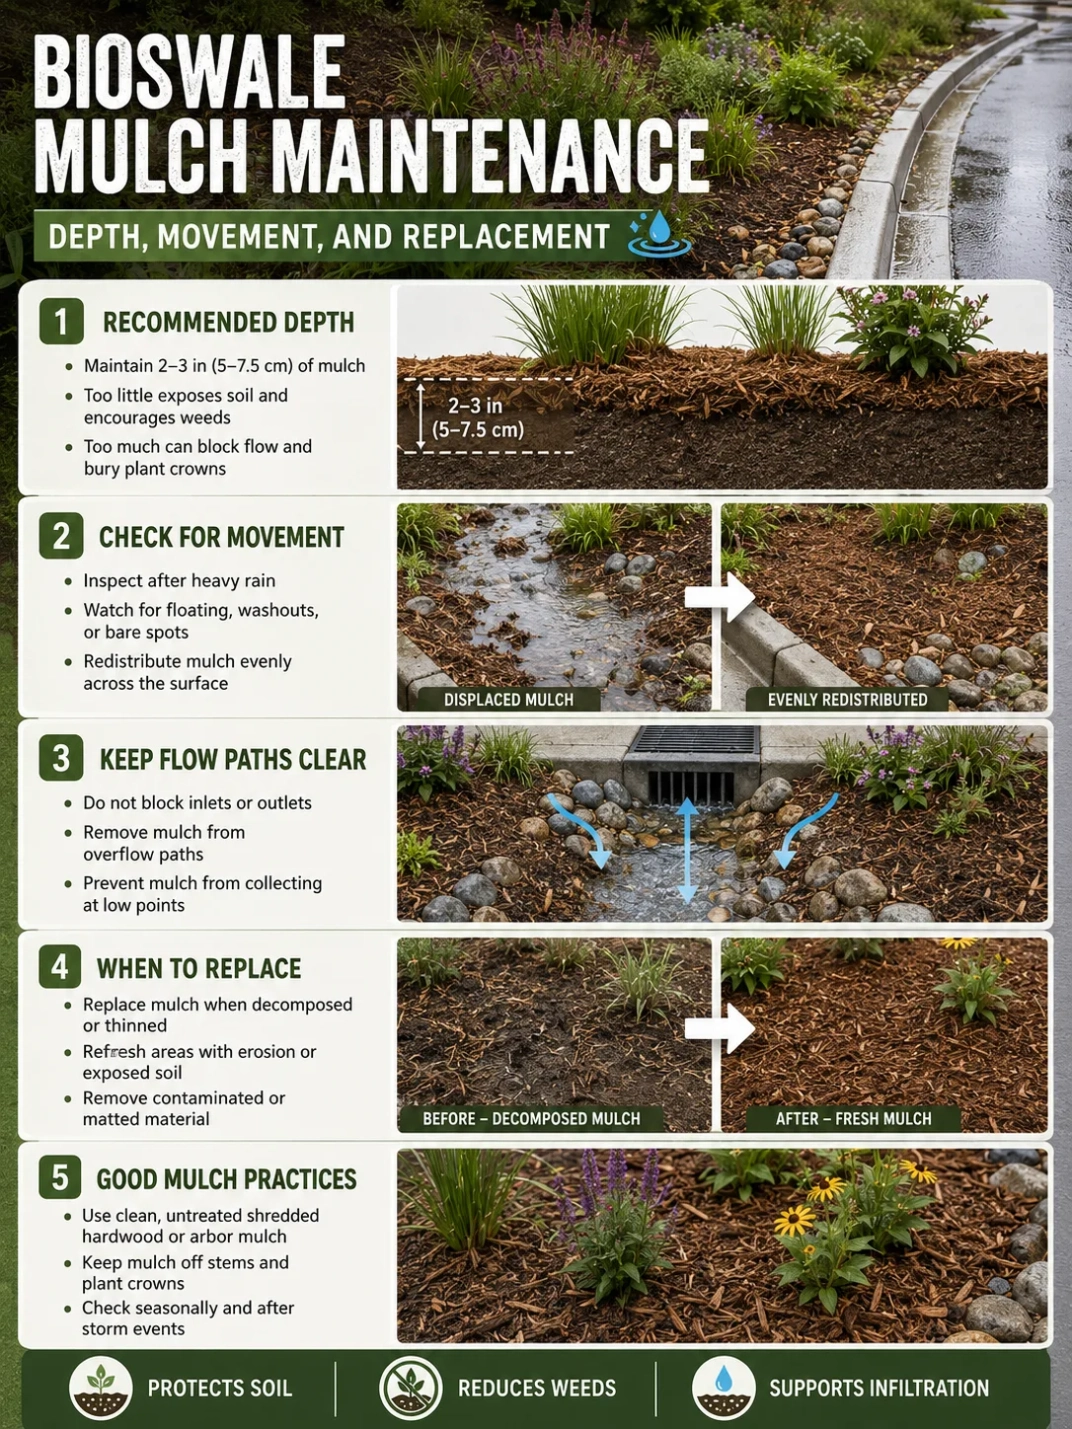
Mulch can reduce light at the soil surface, limit weed germination, conserve moisture during plant establishment, and protect soil from rainfall impact. It is most useful when maintained as an even layer around plants rather than piled against stems or placed so deeply that it blocks shallow flow.
Stormwater can move mulch toward low points, curb openings, check dams, or outlet structures. Redistribute displaced material during inspections. Remove mulch mixed with heavy sediment, litter, or weed seed rather than repeatedly spreading contaminated material across the planting area.
Some bioswales use dense herbaceous cover instead of mulch after establishment. Others retain mulch in upper or drier planting zones. The suitable approach depends on plant type, flow velocity, rainfall pattern, sediment load, and the original design.
Healthy Plant Cover Is the Best Long-Term Defense
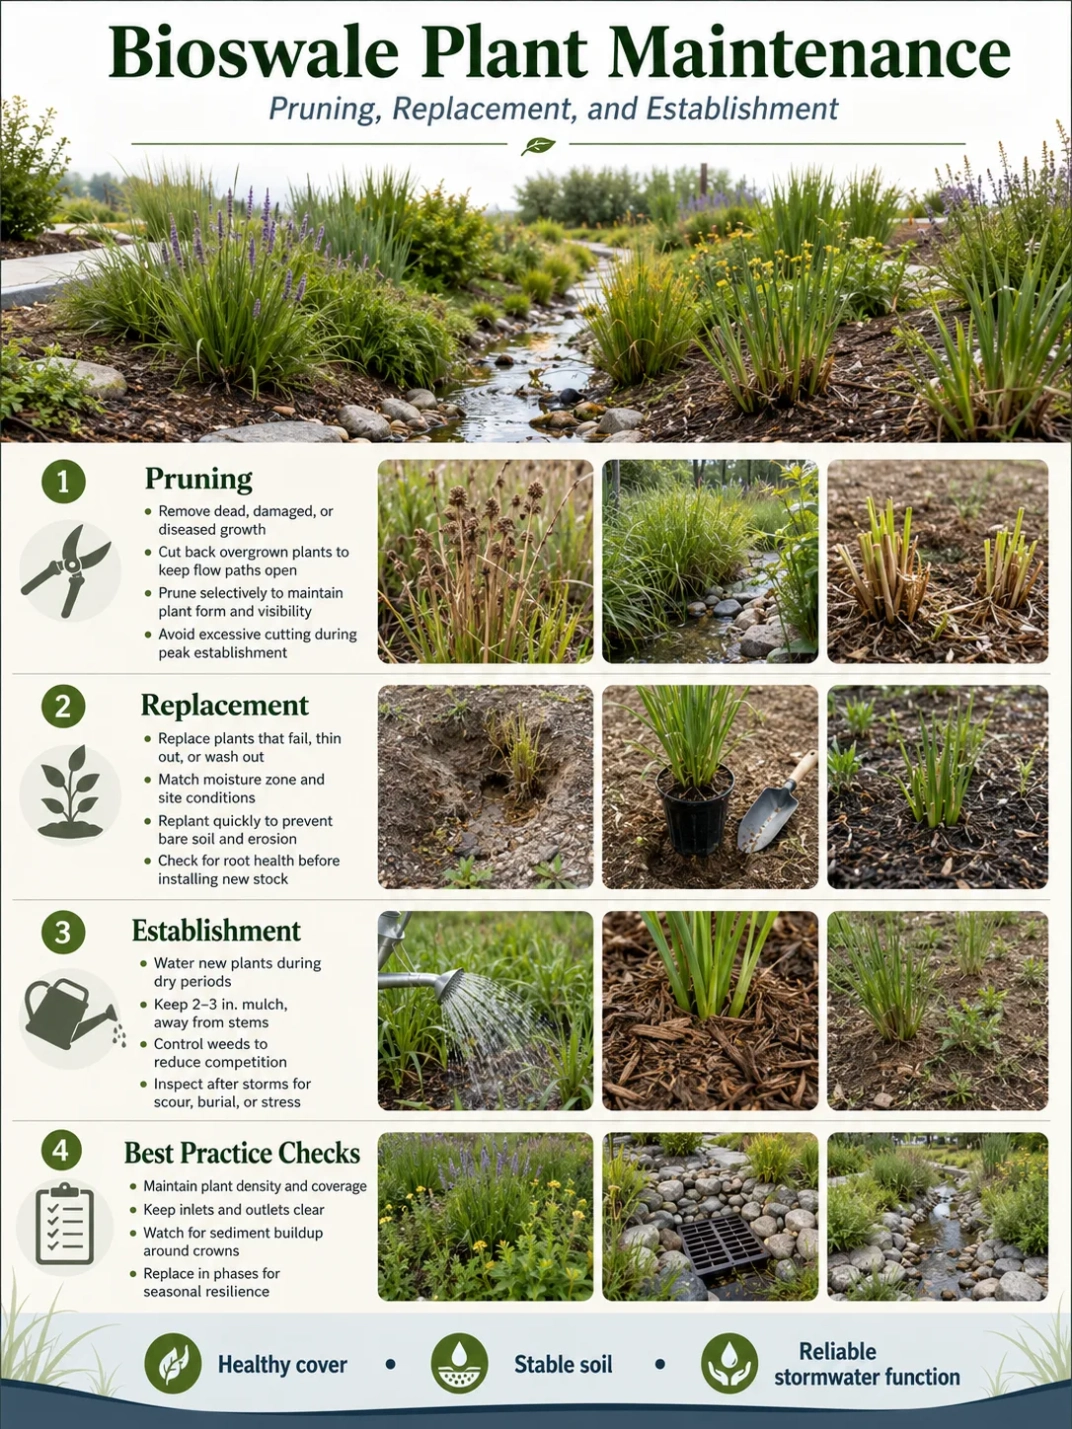
Recurring weed pressure often points to a planting problem rather than a removal problem. Bare areas give weed seeds access to light, moisture, and open soil. Repeated pulling without restoring vegetation leaves the same opportunity in place.
Check why intended plants are failing. Possible causes include:
- Too much or too little moisture for the selected species
- Dense shade or stronger sun exposure than expected
- Buried crowns or exposed roots
- Soil compaction from maintenance traffic
- Sediment accumulation over the original soil surface
- Mulch that is too deep or repeatedly displaced
- Road salt, deicing material, or contaminated splash near traffic areas
- Plant damage from mowing, trimming, animals, or foot traffic
Replacement plants should match the moisture zone. Species near the bioswale bottom may need to tolerate periodic ponding followed by dry periods. Plants on side slopes and upper edges often experience faster drainage and greater drought stress.
Planting Note: Dense planting can suppress weeds, but overcrowding can also reduce airflow, hide litter, and make inspection difficult. Use the spacing and mature size intended for the site rather than filling every visible gap immediately.
Herbicide Use Requires Extra Care
Herbicides should not be treated as a routine substitute for inspection, planting repair, or manual control. A bioswale receives and conveys stormwater, so application errors may affect soil organisms, desirable plants, nearby drainage systems, and downstream areas.
Where herbicide use is permitted and considered appropriate, the product label controls how and where it may be applied. Some products are not intended for use near water, drainage channels, or areas where surface runoff can carry residues. Local rules and site-management policies may add further limits.
Targeted application is usually less disruptive than broadcast spraying. Shielded wiping, stem treatment, or spot treatment may reduce contact with nearby plants when performed by trained personnel and allowed by the product label.
- Confirm the plant identity and decide whether treatment is needed.
- Check the product label for site restrictions, weather limits, protective equipment, and application method.
- Avoid application before expected runoff-producing rain.
- Protect desirable plants, inlets, outlets, open water, and exposed soil.
- Use only the labeled amount and method.
- Record the treated location and inspect for regrowth or plant injury.
Large infestations, invasive species, public sites, and bioswales connected directly to sensitive drainage areas may call for review by a qualified vegetation manager or licensed applicator.
Avoid Salt, Vinegar, and Broad Home Remedies
Homemade weed treatments can damage desirable vegetation and soil without providing reliable root control. Salt can remain in the soil and create stress for bioswale plants. Concentrated vinegar and similar contact treatments may burn leaves while leaving deep roots able to regrow.
Boiling water can injure neighboring roots, soil organisms, plastic components, or nearby surfaces. Flame weeding is poorly suited to dry mulch, public landscapes, roadside areas, and sites with buried or exposed infrastructure.
Mechanical removal and planting repair are usually easier to control and evaluate in a stormwater feature.
Manage Sediment Along with Weeds
Heavy weed growth near an inlet may indicate sediment buildup. Fine soil and road debris can create a shallow, nutrient-rich layer above the designed filter media. Weed seeds then establish in the new surface while water spreads less evenly.
Removing plants without addressing the sediment layer may give only short-term control. Inspect the inlet apron, forebay, stone edge, curb opening, and nearby low points. Remove accumulated sediment carefully without excavating into the original soil media or changing the designed grade.
Sediment removal may need professional review when the boundary between deposited material and engineered soil is unclear, when grading has changed, or when removal could expose an underdrain or erosion-control layer.
Seasonal Weed Control Tasks
Early Growing Season
Look for seedlings before intended plants reach full size. Confirm which perennials survived dormant weather, restore displaced mulch, and remove weeds while roots are small.
Midseason
Remove plants approaching seed production. Check whether dense growth is hiding standing water, erosion, litter, or sediment. Reinspect previously treated perennial weeds.
Late Growing Season
Limit seed drop and mark areas that need replacement planting. Some intended plants may naturally brown or go dormant, so appearance alone should not determine removal.
Dormant Period
Woody seedlings and persistent root crowns may be easier to see after herbaceous plants die back. Keep enough intended stems and seed heads to meet habitat, erosion-control, and seasonal planting goals.
Common Weed-Control Mistakes
- Removing every volunteer plant: This can eliminate useful cover and create bare soil.
- Pulling weeds from saturated soil: Foot traffic and root removal may disturb the soil surface.
- Leaving mature seed heads: Cut weeds can continue releasing seed if left in place.
- Digging too deeply: Aggressive excavation can damage filter media, roots, underdrain components, or the designed grade.
- Ignoring the cause of bare areas: Repeated removal will not correct unsuitable plants, shade, compaction, sediment, or moisture stress.
- Blocking the flow path with debris: Weed piles and removed vegetation should not remain near inlets, outlets, or overflow routes.
- Using nonselective spray around mixed plantings: Drift or splash can injure the vegetation that protects the bioswale surface.
A Practical Inspection Routine
Weed control works best as part of a broader maintenance walk rather than as an isolated task. Start at the runoff entry point and follow the direction of flow.
- Inspect the inlet for weeds, sediment, litter, mulch buildup, and erosion.
- Walk the upper edge where turf and neighboring plants may spread inward.
- Check side slopes for bare patches, shallow roots, and soil disturbance.
- Inspect the bottom zone for dense weeds, standing water, sediment deposits, and flattened vegetation.
- Keep check dams, overflow routes, and outlet structures visible.
- Remove unwanted plants with the least soil disturbance practical.
- Restore mulch or plant cover where removal leaves exposed soil.
- Record recurring patches that may indicate a moisture, soil, or planting mismatch.
Photographs taken from the same points can show whether a patch is expanding, whether replacement plants are establishing, and whether runoff is repeatedly depositing sediment in one area.
When Professional Review Is Appropriate
Routine hand-weeding does not normally require design changes. Professional review may be useful when weeds are tied to drainage failure, repeated erosion, widespread plant loss, unstable side slopes, deep sediment, persistent standing water, or suspected invasive species.
Seek site-specific advice before excavating near an underdrain, changing the grade, enlarging an inlet, altering an overflow route, or replacing a large part of the planting. Public, roadside, commercial, and regulated stormwater facilities may also have inspection records or approved maintenance plans that need to be followed.
Frequently Asked Questions
How often should weeds be removed from a bioswale?
Inspection frequency depends on climate, growing season, plant establishment, runoff source, and weed pressure. Newly planted bioswales usually need closer attention because open soil and small plants provide more space for weeds. Established sites may need less frequent removal when intended vegetation forms stable cover.
Should every plant that was not intentionally planted be removed?
No. A volunteer plant may be acceptable when it is noninvasive, suited to the site, compatible with the planting plan, and not blocking inspection or water movement. Confirm its identity before deciding.
Can weeds block a bioswale?
Dense growth can trap leaves, litter, mulch, and sediment near inlets or outlets. The plants themselves may not create a complete blockage, but the collected material can redirect runoff or hide erosion and drainage problems.
Is pulling weeds after rain a good idea?
Slightly moist soil can make root removal easier. Wait when the soil is saturated, ponded, or soft enough to rut underfoot. Working under those conditions can compact or disturb the bioswale surface.
Can landscape fabric prevent weeds in a bioswale?
Landscape fabric can interfere with planting, sediment removal, surface infiltration, and future maintenance. It may also become exposed as mulch moves. Its use should match the original design rather than being added as a general weed-control layer.
What should replace weeds after removal?
Small gaps may close as nearby plants grow. Larger bare areas may need suitable replacement plants, erosion protection, or restored mulch. Choose vegetation for the specific moisture, sunlight, salt exposure, and flow conditions of that part of the bioswale.