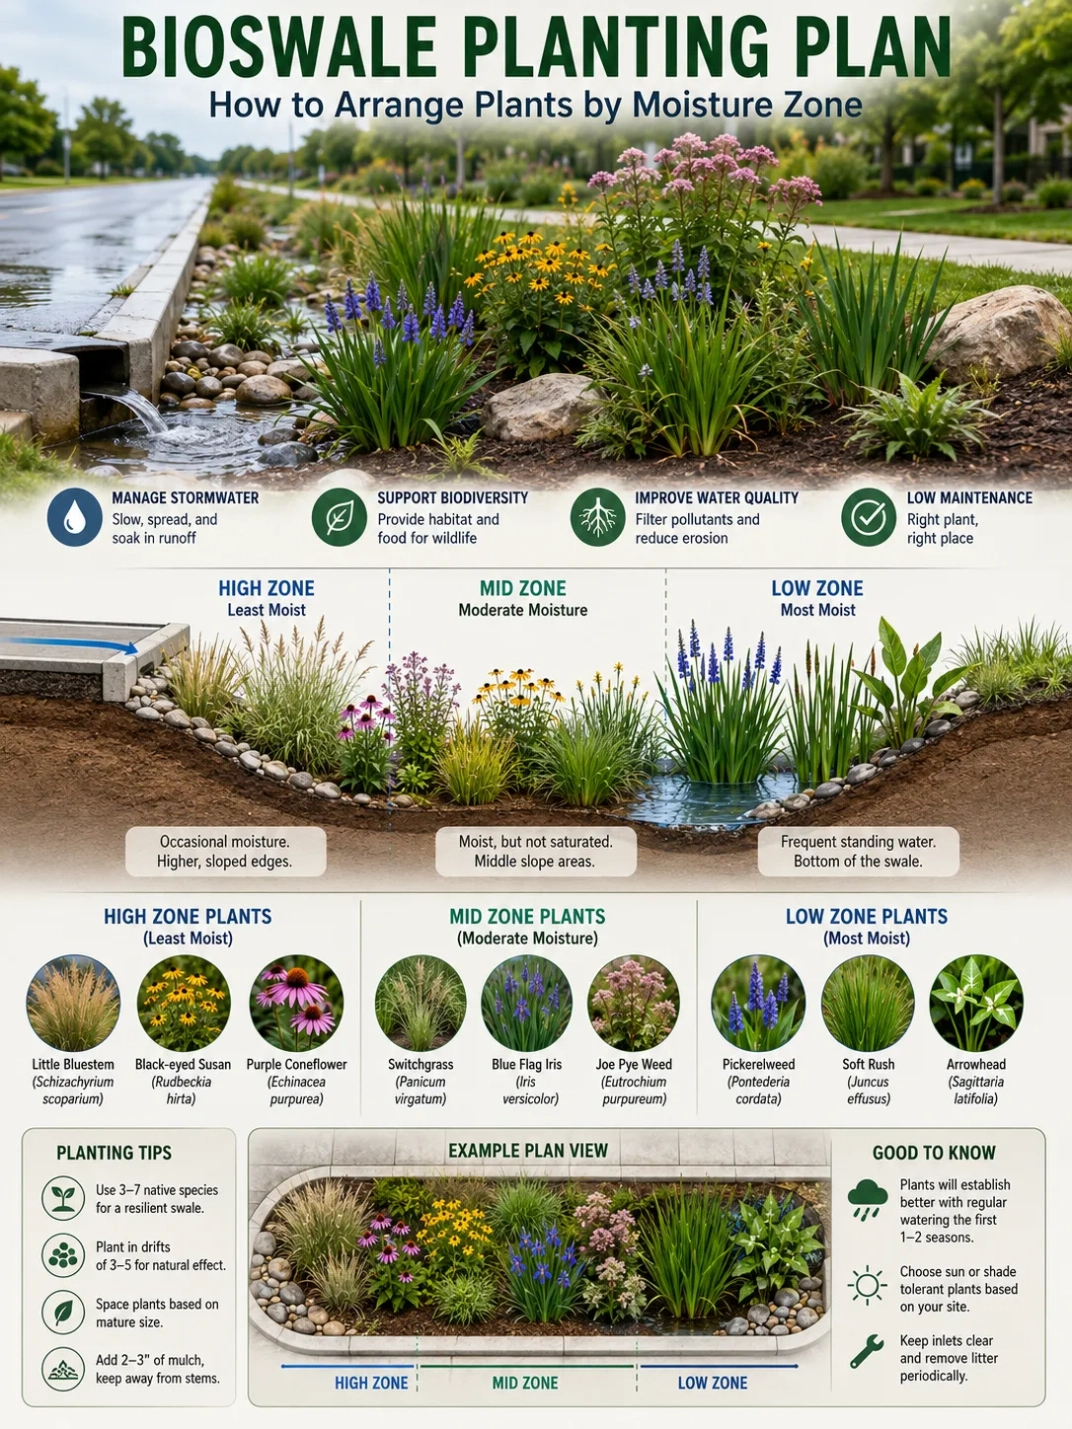
A bioswale planting plan should follow the path of water, not a decorative pattern. Plants that tolerate short periods of ponding belong in the lowest part of the swale, adaptable species belong on the side slopes, and plants that prefer faster-draining soil belong near the upper edge. The inlet and overflow area need separate attention because they experience stronger flow, sediment, and physical disturbance.
The useful question is not simply whether a plant “likes wet soil.” It is whether the plant can handle the frequency, depth, and duration of wetting at its exact position, then remain healthy during dry weather between storms. A bioswale may be briefly wet and dry for much of the growing season. Its planting must fit both conditions.
Read the Water Pattern Before Placing Plants
Moisture zones form because elevation, soil, runoff entry, shade, compaction, and drainage differ across the swale. The bottom usually receives the most water. Side slopes drain sooner. The upper shoulder may receive little direct ponding, even when it sits only a short distance from the center.
These zones are not fixed bands. A low spot near an outlet may stay wetter than the rest of the bottom. A compacted side slope may hold water longer than expected. A sunny inlet may dry faster than a shaded section downstream. Map observed water behavior whenever possible, rather than assigning plants from elevation alone.
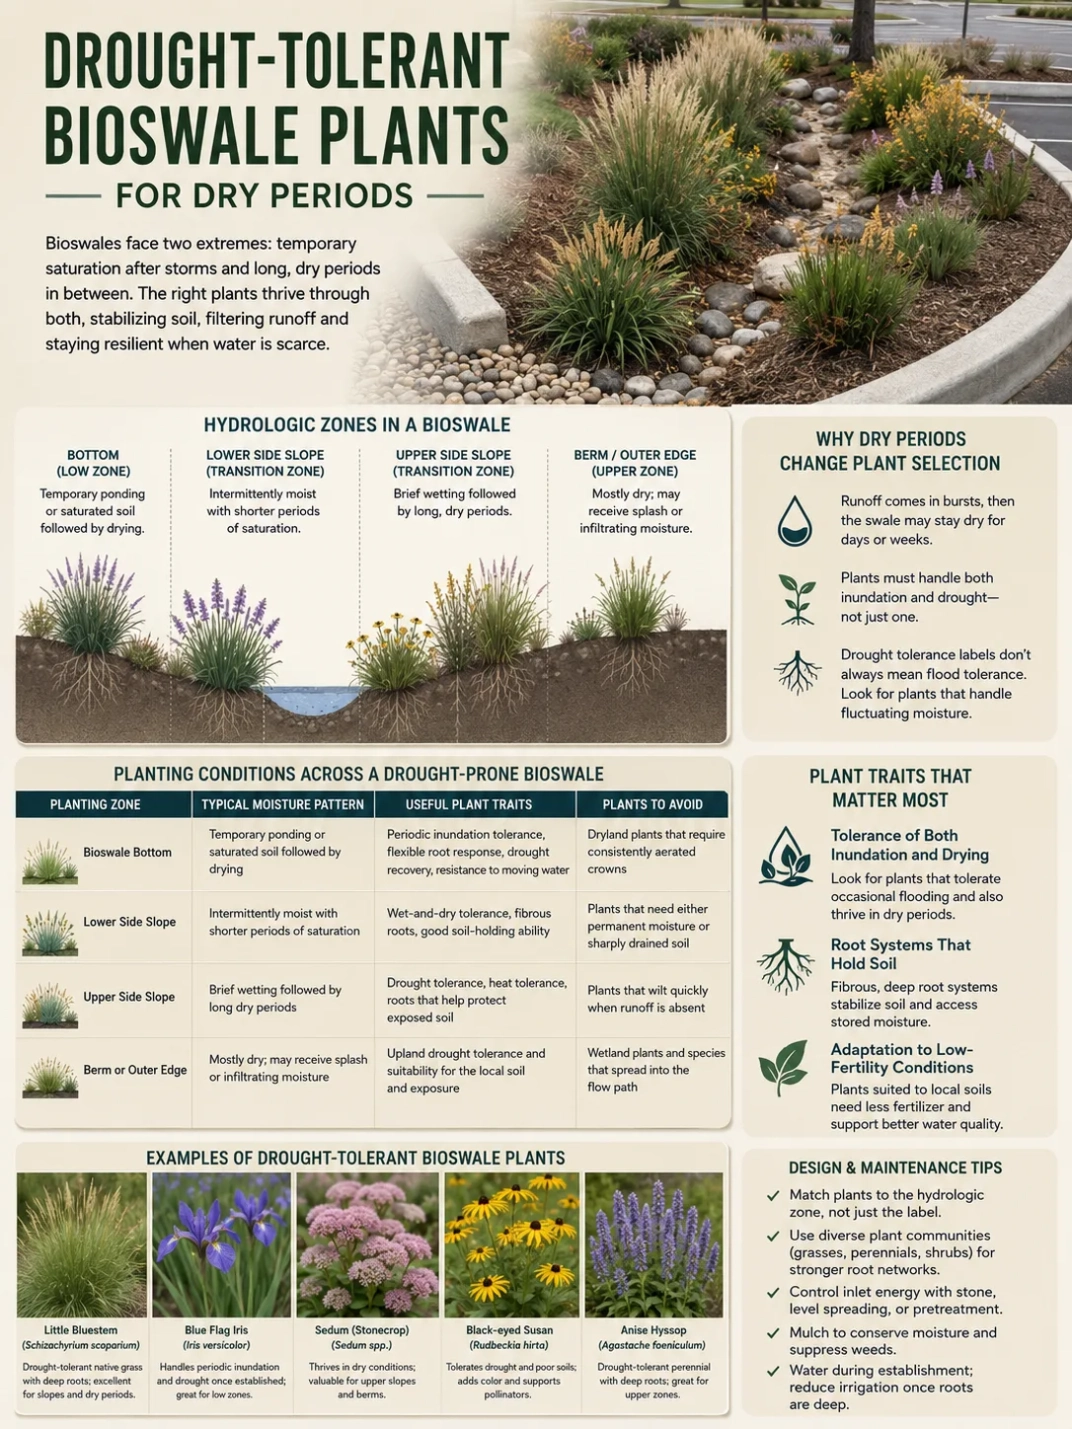
| Planting Area | Typical Water Exposure | Useful Plant Traits | Main Placement Concern |
|---|---|---|---|
| Bottom Zone | Receives ponding and remains moist longest after runoff enters | Tolerates temporary inundation, saturated soil, and later dry periods | Avoid species that need permanent standing water unless the site actually provides it |
| Lower Side Slope | Wet during storms, then drains sooner than the bottom | Handles alternating moist and dry soil; roots spread through the slope | Keep soil covered to limit erosion and weed openings |
| Upper Side Slope | Receives splash, lateral moisture, and occasional shallow flow | Tolerates drier soil while helping hold the slope | Do not rely on wetland-only plants |
| Upper Edge | Usually drains fastest and may resemble a normal landscape bed | Drought tolerance, dense cover, and compatibility with nearby paving or lawn | Prevent tall growth from blocking sightlines or access |
| Inlet and Overflow Areas | May receive concentrated flow, sediment, debris, or occasional bypass water | Flexible stems, dense roots, and recovery after disturbance | Leave structures visible and reachable for inspection |
Planting Note: Treat moisture-zone boundaries as transition areas. Mixing a few compatible species across each boundary usually produces a more stable planting than drawing rigid rings around the swale.
Zone 1: The Bottom or Ponding Area
The bottom zone receives runoff first or collects it after water moves down the side slopes. Depending on the design, water may infiltrate through soil media, move toward an underdrain, or continue toward an outlet. Plants here must tolerate the wettest conditions in the swale without depending on constant saturation.
Look for plants described for wet-to-moist soil, occasional flooding, or fluctuating water levels. Sedges, rushes, moisture-tolerant grasses, and selected flowering perennials often fit this role. Regional suitability still matters. A species adapted to a wet meadow in one climate may not tolerate the heat, winter conditions, salt exposure, or dry interval at another site.
Use Dense Roots, Not Just Tall Top Growth
Dense fibrous roots help hold the soil surface and maintain small pathways for water movement. They also help the planting recover when sediment or flowing water bends the stems. Tall plants with sparse bases may leave exposed soil between crowns, especially during establishment.
Place lower or flexible plants where water spreads across the surface. Taller plants can sit farther from direct inlet flow, where they are less likely to flatten, trap large debris, or hide erosion.
Do Not Confuse Temporary Ponding with a Wetland
A planted bioswale is commonly designed to drain between rainfall events. A plant that needs continuously saturated soil may decline if the bottom dries for long periods. Conversely, a drought-only species may fail after repeated ponding. Choose plants for the full wet-and-dry cycle.
Zone 2: The Lower Side Slopes
The lower side slopes are often the most useful planting area because they experience both runoff and drainage. Plants here may be wet during a storm, moist for a period afterward, and dry later. Species with broad moisture tolerance usually perform better than plants tied to one narrow soil condition.
This zone also carries an erosion-control role. Rainfall, inlet splash, and shallow surface flow can loosen exposed soil. Use repeated groups of grasses, sedges, and spreading perennials to create continuous cover across the slope. Bare decorative gaps may look orderly at installation but can become channels for water and weeds.
Plant Across the Contour
Arrange clumps across the slope rather than in straight lines running downhill. Downslope rows can reinforce narrow flow paths if water moves between plants. Staggered drifts interrupt that path and spread roots through more of the soil.
Plant crowns should sit at the intended finished grade. Setting them in small pits can create unintended pockets of standing water. Mounding every plant can shed water away from the root zone. Both patterns change the moisture plan.
Zone 3: The Upper Side Slopes and Shoulder
The upper zone may look close to the water, yet it often behaves like a dry landscape edge. It receives less ponding and loses moisture through drainage, sun, and wind. Plants placed here need stronger dry-soil tolerance, while still coping with occasional splash or runoff during larger storms.
Deep-rooted grasses, durable flowering perennials, low shrubs, and other regionally suitable upland plants can stabilize this area. Their mature size needs review before planting. Along sidewalks, driveways, parking areas, and roads, keep stems from leaning into travel paths or blocking visibility.
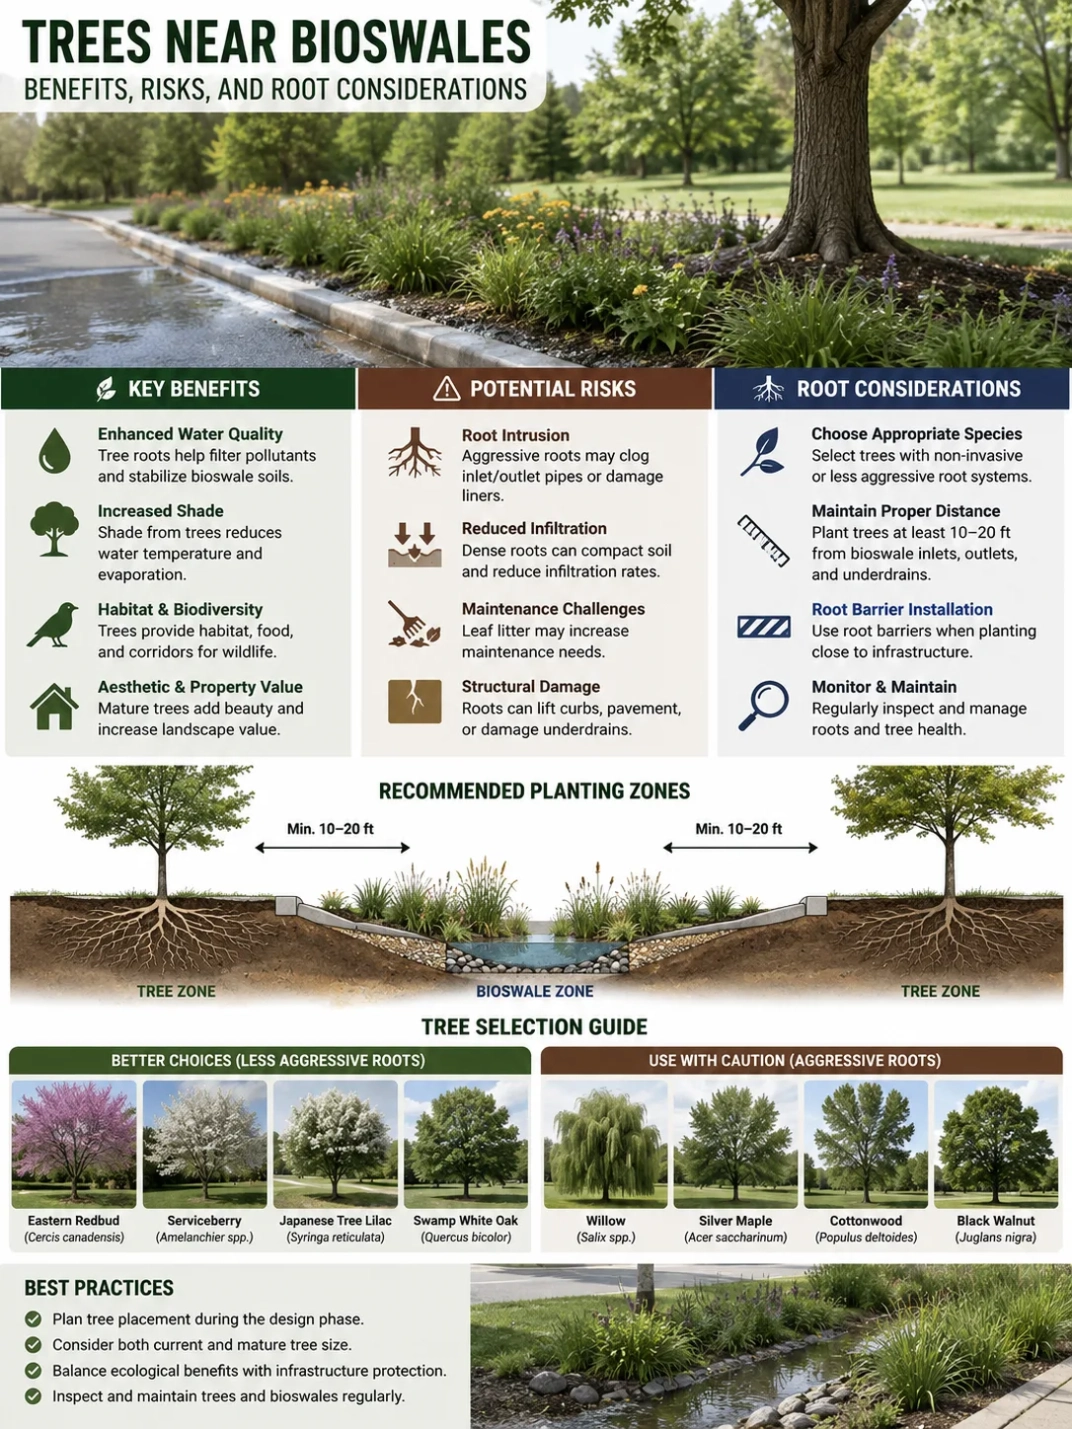
Site Planning Note: The upper edge is not a safe place for every tree or shrub. Root spread, mature canopy, utilities, pavement clearance, sightlines, and access to drainage structures may limit woody planting.
Treat the Inlet as Its Own Planting Zone
The inlet receives more than water. Roof grit, roadway sediment, leaves, mulch, and litter may collect where runoff enters. Concentrated flow can scour soil before it spreads through the bioswale. Planting directly in that impact point without checking water movement can lead to buried crowns, exposed roots, or repeated washout.
Use low, flexible, densely rooted plants beside the inlet, but keep the entry opening visible. Where the design includes stone, a level spreader, curb cut, sediment forebay, or another pretreatment feature, do not let vegetation block its intended flow path.
Leave Room for Sediment Removal
Sediment commonly accumulates near the inlet before it reaches the full length of the swale. A planting plan should leave enough reach and working space to remove deposits without crushing a large section of established vegetation. Dense planting is useful, but inaccessible planting is not.
Keep the Outlet and Overflow Route Open
An overflow route allows excess runoff to leave the bioswale when inflow exceeds available storage or infiltration. It may connect to a surface spillway, drain structure, pipe, curb opening, or another approved drainage path. Plants should not hide, constrict, or redirect this route.
Use lower vegetation near overflow structures and avoid species known for dense woody suckers in access areas. The outlet should remain easy to inspect for debris, erosion, displaced mulch, and unwanted ponding. Where flowing water is expected, plant roots can support the soil, but plants do not replace proper outlet stabilization.
Choose Plant Traits Before Choosing Species
A regional plant list is useful only after the site has been divided into real moisture and exposure zones. Begin with functional traits, then identify locally appropriate species.
- Moisture range: Can the plant tolerate both the wettest event and the driest interval expected in its zone?
- Root form: Does it form dense fibrous roots, deep roots, rhizomes, or a woody root system, and does that form fit the location?
- Growth habit: Will it form cover, remain in a clump, spread aggressively, or leave open soil?
- Mature height and width: Will it cover an inlet, interfere with a path, block visibility, or crowd neighboring plants?
- Sun and heat tolerance: Does reflected heat from pavement change the moisture demand?
- Salt and runoff exposure: Could the inflow carry deicing salt or other stressors from paved surfaces?
- Seasonal structure: Will stems and roots continue protecting soil when the plant is dormant?
- Maintenance response: Can the plant recover from trimming, sediment removal, weed control, or occasional trampling?
Native plants can be a good starting point because locally adapted species may fit regional rainfall, soils, and seasonal conditions. Native status alone does not prove that a plant belongs in the bottom of a bioswale. Its habitat, moisture range, growth habit, and site exposure still need to match.
Arrange Plants in Drifts, Matrices, and Repeated Groups
A moisture-zone plan does not need to look like three stripes. Natural-looking drifts can cross zone boundaries when the selected plants tolerate both sides. Repetition helps the planting read as one system and makes maintenance easier because the same plants appear in recognizable groups.
Use a Ground-Layer Matrix
A matrix is a repeating layer of grasses, sedges, rushes, or low perennials that covers much of the soil. Taller flowering plants or shrubs can rise through that layer. The matrix limits bare ground, links the moisture zones, and reduces dependence on isolated specimen plants.
Repeat Adaptable Plants Through Transition Areas
Plants with wet-to-dry tolerance can connect the bottom to the slopes. Repeating them in several positions also reveals how the site behaves: plants thriving only at one elevation may show that the moisture boundary differs from the original plan.
Cluster Vulnerable Plants Away from Disturbance
Plants with brittle stems, slow establishment, or low tolerance for sediment belong away from curb cuts, stepping areas, drain structures, and maintenance routes. Place tougher species along those edges.
Account for Soil, Shade, and Compaction
Elevation does not control moisture by itself. Soil texture and compaction can change how long water remains around roots. Sandy soil may drain rapidly. Clay-rich or compacted soil may drain slowly or push water sideways. Engineered soil media may behave differently from the undisturbed soil around it.
Shade can also alter the pattern. A shaded bottom may remain moist longer, while a sunny edge beside dark pavement may dry quickly. Downspout discharge, curb cuts, check dams, underdrains, and local depressions can create smaller wet or dry pockets within the three main zones.
Soil Note: Plant selection cannot correct a blocked outlet, compacted subgrade, unsuitable soil media, or an incorrect finished grade. Persistent standing water, widespread plant loss, or flow bypassing the swale may point to a drainage issue rather than a planting issue.
Plan for Establishment, Not Only Mature Growth
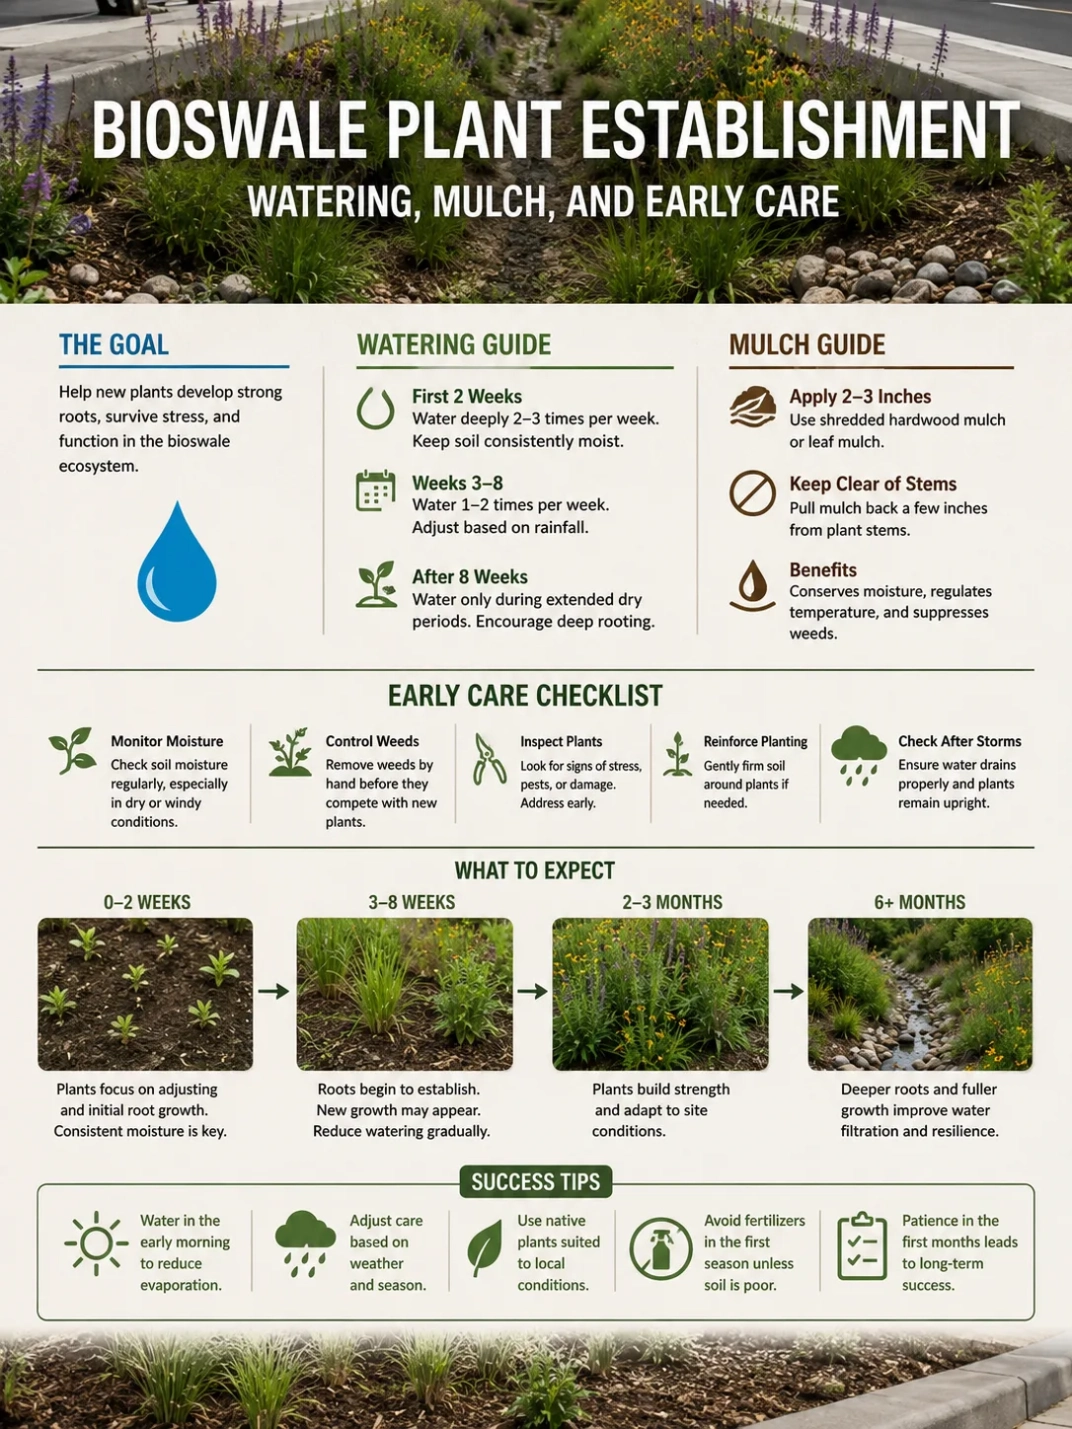
New plants have limited roots and may need supplemental watering even in a stormwater feature. Rainfall may arrive at the wrong time, bypass a root ball, or drain before young roots can use it. Watering needs depend on climate, planting season, plant size, soil, and weather.
Close spacing can reduce open soil, but plants still need enough room for mature spread and maintenance. Biodegradable erosion-control materials or other approved stabilization may be useful on vulnerable slopes while roots establish. Loose mulch should be used carefully where concentrated flow can carry it into an outlet or pile it over plant crowns.
Mark Zones Before Planting
After grading is complete, mark the bottom, lower slope, upper slope, inlet, overflow, and maintenance path on the ground. Then place plants in containers before digging. This makes it easier to correct spacing, keep structures open, and avoid accidentally moving dry-zone plants into the ponding area.
A Practical Planting Sequence
- Confirm the finished grade and flow path. Check where runoff enters, spreads, ponds, overflows, and exits.
- Identify moisture zones. Mark the bottom, transition slopes, upper edge, inlet impact area, and outlet access area.
- Record site stresses. Note sun, shade, reflected heat, soil texture, compaction, sediment load, salt exposure, and foot traffic.
- Assign plant traits to each zone. Choose tolerance ranges and growth habits before selecting exact species.
- Select regionally suitable plants. Check local invasive-species guidance and confirm mature size.
- Build a repeating ground layer. Cover soil with compatible grasses, sedges, rushes, or low perennials suited to each moisture band.
- Add taller accents carefully. Keep them away from inlets, outlets, sightlines, and maintenance paths.
- Review the plan as a drainage system. Make sure plants do not narrow the flow path or hide structures.
- Plan establishment care. Include watering, weed control, erosion checks, and replacement of failed plants.
Where Bioswale Planting Plans Commonly Fail
Using One Plant Palette Everywhere
A single species may perform well in the middle of its preferred moisture range but fail at both extremes. Use several compatible species and match them to smaller site zones.
Placing Wetland Plants Across the Entire Swale
The upper slope may be too dry, while the bioswale bottom may also dry between storms. Plant descriptions should be checked for tolerance of fluctuating moisture, not only wet habitat.
Leaving Decorative Bare Soil
Open spaces can invite weeds, surface crusting, mulch movement, and erosion. Plant cover should become dense enough to protect the soil while preserving inspection access.
Blocking the Inlet or Overflow
Plants may trap debris and redirect water before it enters the treatment area. Keep drainage structures visible and maintain a clear route for larger flows.
Ignoring Mature Size
A small transplant can become a wide shrub, tall grass, or spreading colony. Check its mature form against paths, curbs, visibility, utilities, and service access.
Treating Plant Loss as a Plant-Only Problem
Repeated failure in the same area may reveal scour, sediment burial, poor drainage, unsuitable soil, excessive dryness, or an altered flow path. Replacing the same plant without checking the cause often repeats the failure.
Adjust the Plan After Real Storms
A planting drawing predicts moisture zones; storm observations confirm them. During the establishment period, inspect the bioswale after rainfall and during dry weather. Look for flattened vegetation, exposed roots, sediment fans, dry pockets, lingering ponding, bare slopes, blocked outlets, and plants leaning into access routes.
Move or replace plants when the observed moisture pattern does not match their tolerance. Add compatible cover where soil remains open. Correct drainage or erosion defects before using more plants to hide them. A working planting plan is allowed to change as the site reveals how water actually moves.
When Professional Review Is Appropriate
Professional review is sensible where the bioswale receives runoff from roads or large parking areas, sits near a foundation, affects neighboring property, connects to a public drainage system, includes an underdrain or control structure, or must meet a local stormwater requirement. The planting plan should coordinate with the hydraulic design rather than alter it.
Utility locating, soil evaluation, grading, overflow routing, traffic visibility, and access requirements may also shape where plants can go. Local codes and approved plans take priority where they apply.
Frequently Asked Questions
How Many Moisture Zones Does a Bioswale Need?
Three broad zones—bottom, side slope, and upper edge—work as a starting point. Most sites also need separate treatment at the inlet, outlet, overflow route, and any shaded or compacted pockets.
Should the Wettest Plants Go Directly Beside the Inlet?
Not necessarily. The inlet may receive forceful flow, sediment, and debris. Plants beside it should tolerate moisture and physical disturbance, while the direct impact point may need non-plant stabilization or pretreatment defined by the design.
Can the Same Plant Grow in More Than One Zone?
Yes. Species with a broad wet-to-dry tolerance are useful across transition areas. Their performance can also help reveal where the actual moisture boundaries occur.
Do All Plants in the Bottom Need to Be Wetland Plants?
No. Many bioswales drain between storms. Bottom-zone plants often need to tolerate temporary ponding followed by ordinary moist or dry soil rather than permanent saturation.
Are Native Plants Required for a Bioswale?
Requirements vary by project and location. Native species may offer a good regional fit, but each plant still needs the right moisture tolerance, growth habit, mature size, and exposure for its exact position.
Why Are Plants Dying in Only One Part of the Swale?
A repeated pattern usually points to a local condition such as longer ponding, faster drying, sediment burial, scour, compaction, shade, salt exposure, or unsuitable soil. Check the water path and soil before replacing the plants.