New bioswale plants need deliberate care before their roots can hold soil, compete with weeds, and recover from alternating wet and dry conditions. Good bioswale plant establishment is not simply a matter of watering on a fixed calendar. It means keeping each root zone moist enough for growth, using mulch without blocking stormwater flow, and checking how the newly planted surface behaves after rain.
The establishment period often lasts through at least one full growing season and may extend longer for woody plants, slow-growing species, dry climates, or difficult sites. The care plan should respond to soil moisture, weather, runoff, and plant condition rather than relying on one schedule for every location.
Why Early Care Is Different
A mature bioswale can often rely on rainfall, incoming stormwater, and well-developed roots. Newly installed plants cannot. Their roots still occupy a small planting hole or nursery root ball, while the surrounding soil media may dry at a different rate.
Stormwater also arrives unevenly. The inlet may receive concentrated flow, the bottom may stay damp after rain, and the upper side slope may dry quickly in sun and wind. Treating the whole bioswale as one irrigation zone can leave some plants waterlogged and others dry.
| Task | What to Check | Why It Matters |
|---|---|---|
| Watering | Moisture around the root ball and nearby soil | Supports root growth without keeping the full bed saturated |
| Mulch Care | Bare spots, piles, floating material, and buried plant crowns | Limits weeds and moisture loss while keeping flow paths open |
| Weed Control | Fast-growing weeds near young plants | Reduces competition for light, water, and rooting space |
| Storm Inspection | Erosion, sediment, displaced mulch, ponding, and blocked openings | Shows whether runoff is entering, spreading, and draining as intended |
| Plant Replacement | Dead plants, repeated stress, and empty areas | Restores cover before bare soil becomes an erosion or weed problem |
Watering Newly Planted Bioswale Vegetation
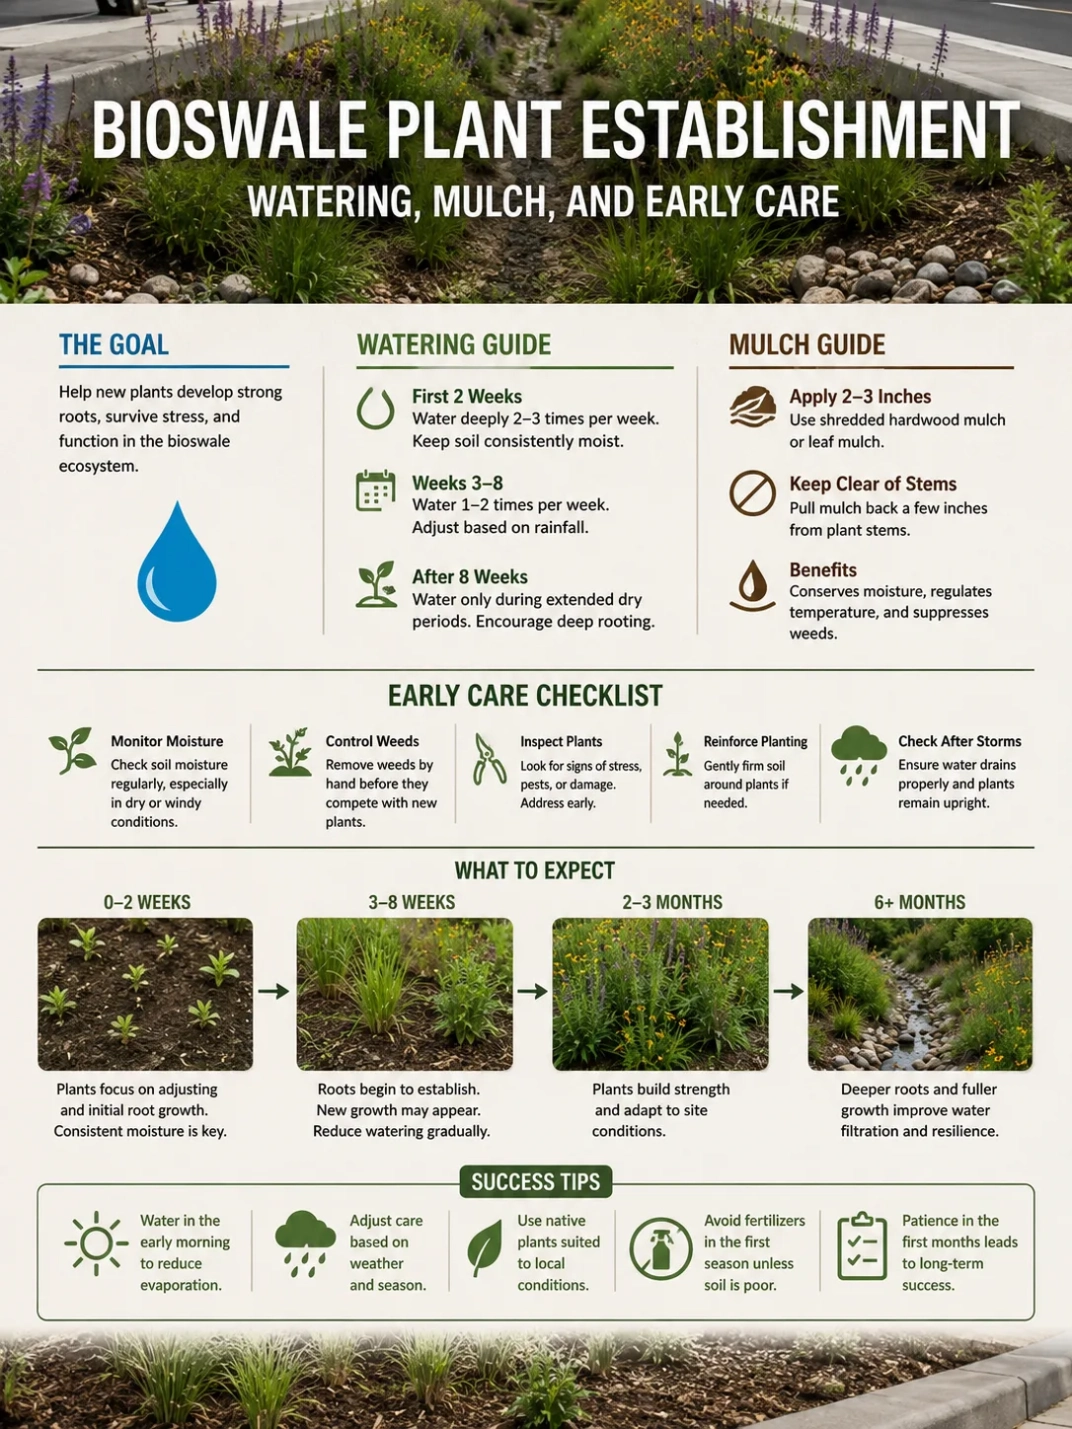
Water new plants thoroughly after installation so the planting soil settles around the roots and large air pockets are reduced. After that first watering, use the condition of the root zone to decide when more water is needed.
Check Below the Surface
The top layer can look dry while the root zone remains moist, especially in fine-textured soil or beneath mulch. It can also look damp after a brief shower even though the nursery root ball is still dry. Move a small amount of mulch aside and check the soil near the roots with a finger, trowel, or soil probe.
Water when the root zone is becoming dry, not merely because the surface has changed color. Wilting, folded leaves, dull foliage, or early leaf drop can show moisture stress, but those symptoms may also appear when roots remain too wet. Soil condition should guide the response.
Water the Roots, Not the Whole Basin
Slow application near each plant is usually more useful than spraying the entire bioswale. A hose, watering wand, temporary drip line, or low-flow irrigation system can deliver water to the root zone with less erosion and less waste.
Apply water slowly enough to soak in. Fast irrigation can run across the mulch, move fine soil, enter an underdrain, or leave through an overflow before the roots receive enough moisture. On clayey native soil, a slower application may be needed. Sandy or engineered soil media may accept water quickly but dry sooner.
Planting Note: Check plants in the lowest zone and on the upper side slopes separately. The bottom may receive runoff while slope plants still need supplemental water.
Adjust for Rainfall and Runoff
A rain event does not automatically replace irrigation. A light shower may wet mulch without reaching the roots. In contrast, runoff from a roof, road, driveway, or parking lot may deliver much more water than rainfall alone.
After rain, check whether the intended runoff actually entered the bioswale. A blocked curb cut, disconnected downspout, construction barrier, sediment ridge, or incorrect grade can leave the bed dry even during wet weather.
Reduce Watering Gradually
As roots spread beyond the original planting hole, watering can become deeper and less frequent. Reduce supplemental irrigation in stages while watching plant response. The aim is to support roots as they move into the surrounding soil, not to keep the planting area continually wet.
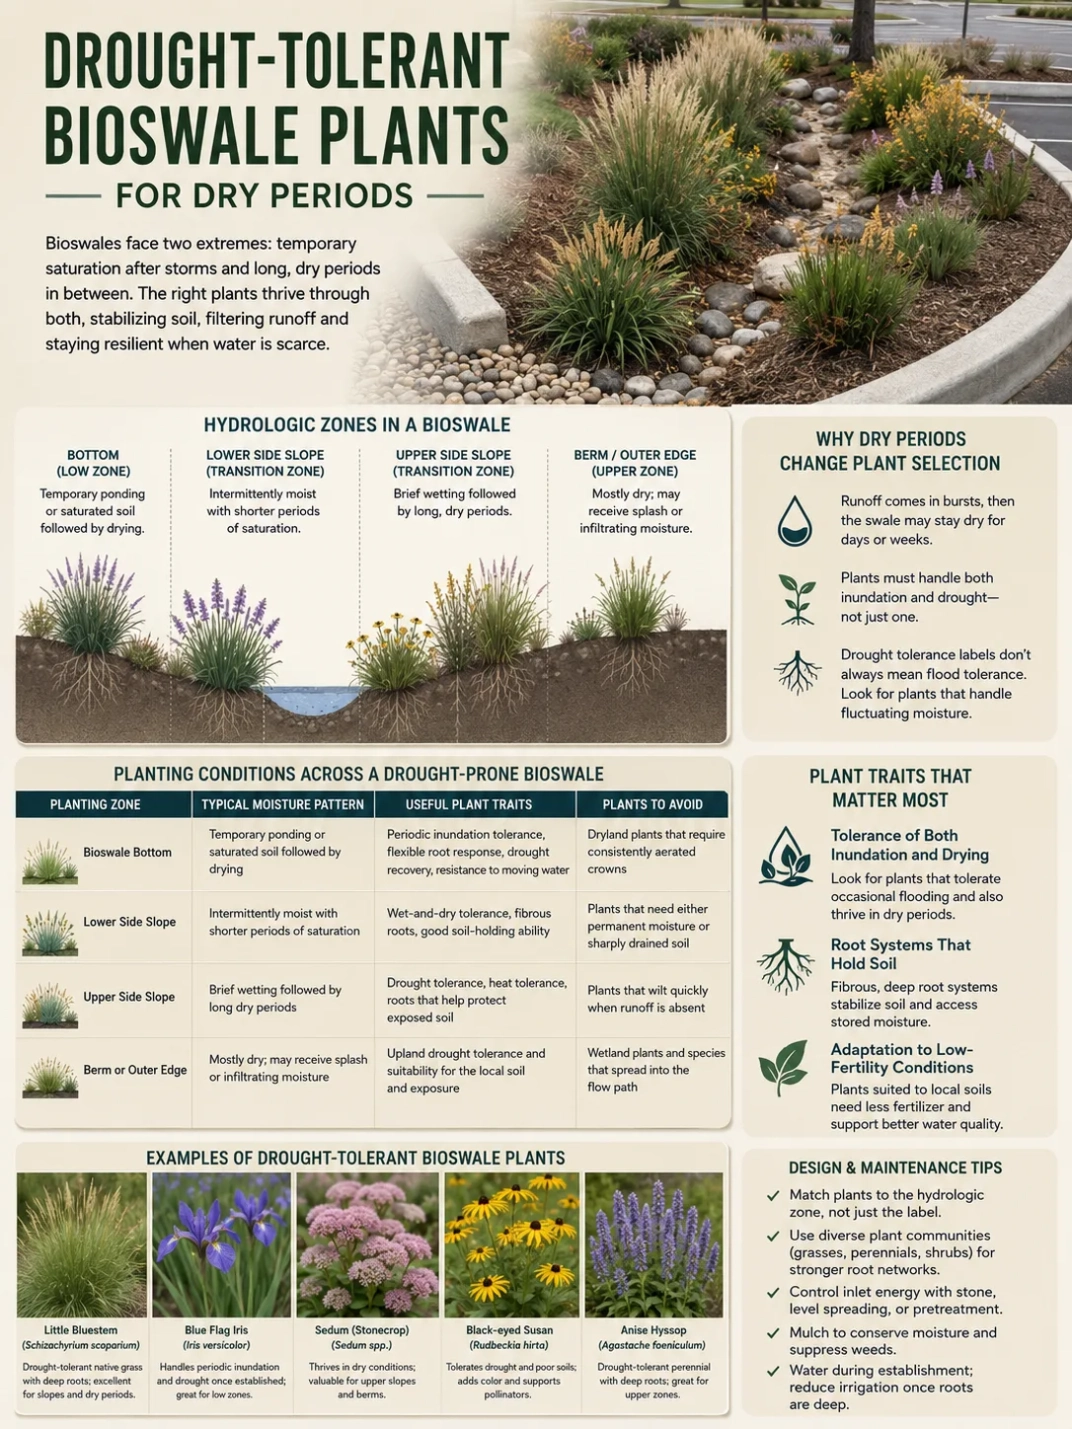
Drought-tolerant species may still need regular attention during establishment. Their mature drought tolerance does not mean a newly installed root system can withstand long dry periods.
Mulch in a Stormwater Flow Path
Mulch can hold moisture, soften soil-temperature changes, reduce splash erosion, and slow weed growth. In a bioswale, however, mulch is also exposed to moving water. Material choice and placement matter.
Choose Material That Stays in Place
Loose, light pieces can float during ponding or collect at an outlet. A coarse, fibrous, or interlocking mulch specified for bioretention is often less likely to move than lightweight decorative material. Local stormwater plans may name an approved mulch type for public or permitted facilities.
Stone is not an automatic substitute. It can behave differently in heat, support different weed patterns, and allow sediment to settle between particles. Use it only where it fits the planting plan, hydraulic design, and maintenance method.
Keep Crowns, Stems, and Trunks Clear
Spread mulch across exposed soil without piling it against stems or tree trunks. Do not bury the crown of grasses, sedges, rushes, perennials, or shrubs. Deep piles around small plants can trap moisture against stems, hide weeds, and smother new growth.
Maintain the finished ponding area shown in the design. Adding mulch repeatedly without accounting for old material can raise the bed surface, reduce available storage, alter shallow flow, or direct water around plants.
Protect Inlets, Outlets, and Overflow Routes
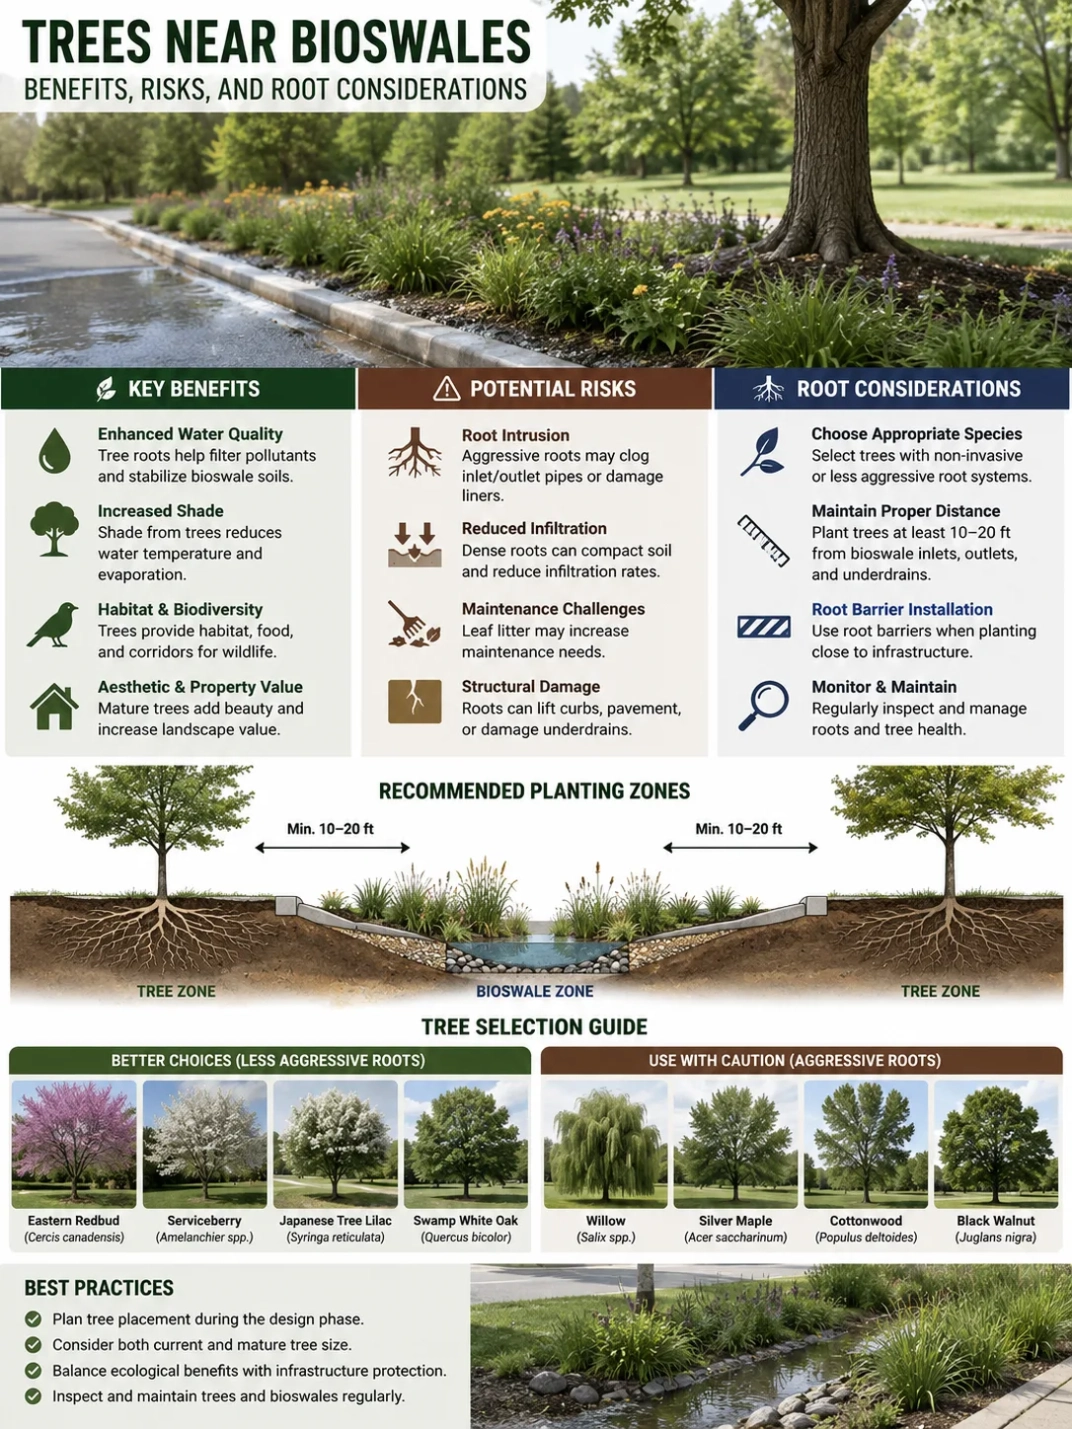
Mulch should not form a ridge across an inlet or cover an outlet grate, underdrain observation point, check dam, or overflow opening. After a storm, redistribute displaced mulch before it forms a dam or leaves bare soil exposed.
Maintenance Note: Replace only what is missing. Raking and redistributing existing mulch may be enough. Repeatedly adding a full new layer can change grades and bury plant bases.
Early Care Beyond Water and Mulch
Young bioswale vegetation needs open soil, clear flow paths, and limited competition. Watering alone cannot correct sediment burial, compacted soil, or an inlet that sends a hard jet of runoff into the planting bed.
Control Weeds While They Are Small
Hand removal is often the least disruptive method near young plants. Pull weeds before they flower or produce seed, and remove the full root where practical. Marking newly planted species can help maintenance crews avoid pulling desirable seedlings or dormant plants.
Use light foot traffic and work from the edge where possible. Repeated walking, wheelbarrow traffic, or machinery can compact filter media and crush small plants. Heavy equipment should stay out of the planted bed unless repair work requires it and the soil can be restored afterward.
Keep Construction Sediment Out
A newly built bioswale should not become the sediment trap for an unfinished site. Fine sediment can coat mulch, bury plant crowns, clog surface pores, and change the elevation around inlets. Stabilize exposed soil in the contributing drainage area and keep temporary sediment controls in place until nearby construction is complete.
If sediment has already entered, remove it carefully rather than mixing it into the planting soil. The original grade, ponding area, and inlet elevation should remain visible.
Repair Small Erosion Early
Rills near an inlet, exposed roots, washed-out planting holes, or a bare strip along the main flow path show that water is too concentrated or the surface is not yet protected. Regrade loose soil, reset displaced plants, restore mulch or approved erosion protection, and correct the source of concentrated flow.
Simply filling the eroded area may provide only a temporary repair. The inlet shape, curb cut, splash pad, check dam, slope, or upstream sediment control may also need attention.
What Plant Stress May Be Showing
| Observed Condition | Possible Cause | Useful First Check |
|---|---|---|
| Wilting during dry weather | Dry root ball, shallow watering, hot wind, or transplant stress | Check moisture beside and inside the original root ball |
| Wilting while soil is wet | Low oxygen around roots, poor drainage, or damaged roots | Check drainage time and whether the outlet or underdrain is obstructed |
| Plants near the inlet are buried | Sediment deposition or displaced mulch | Inspect the contributing area and inlet flow |
| Upper-slope plants decline first | Faster drying, runoff bypass, or irrigation not reaching the slope | Compare soil moisture by planting zone |
| Bare channels form through mulch | Concentrated flow or an unstable surface | Inspect grade, inlet energy, and erosion protection |
| Several plants of one species fail | Poor fit with moisture, sun, salt, soil, or planting zone | Compare failures with the planting plan and site exposure |
One failed plant may reflect transplant damage. A repeated pattern often points to the site. Map where plants are failing before replacing them. A line of dead plants along the bottom, near a curb cut, or on one sunny slope gives more information than the total number lost.
Care by Planting Zone
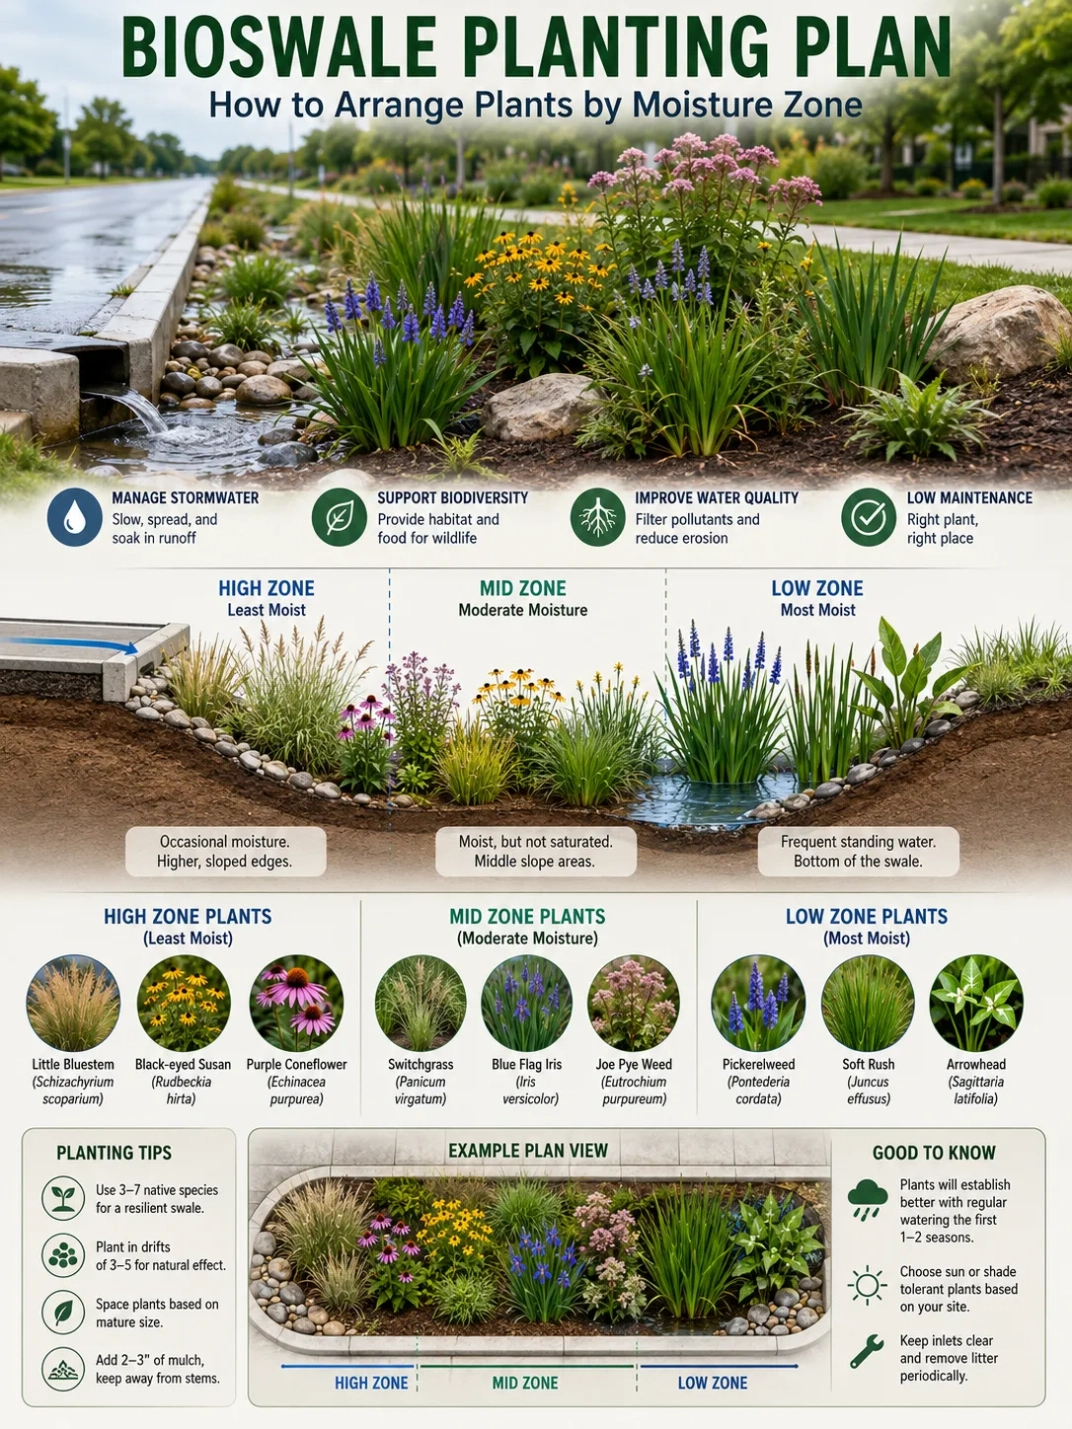
The Bottom Zone
The lowest part receives the longest ponding and may collect fine sediment. Plants here need tolerance for short wet periods followed by drying. During establishment, avoid adding irrigation merely because the upper soil looks dry; check moisture below the mulch first.
Watch for sediment around stems, mulch rafts, standing water that lasts longer than the approved design allows, and plants leaning after strong inflow.
The Side Slopes
Side slopes can dry faster and are more exposed to erosion before roots knit the soil together. Water gently so irrigation does not cut small channels. Keep mulch even, but do not allow it to slide into the bottom and leave the slope bare.
The Upper Edge
Plants along the upper edge may receive little ponding and should be treated more like dry landscape plants during establishment. They still support the bioswale by slowing sheet flow, holding the rim, and separating the planted area from paths, turf, or pavement.
Soil Note: A bioswale may contain engineered soil media over native soil, an underdrain, or a liner. Moisture behavior can differ sharply from a normal garden bed, so irrigation should follow the actual section and drainage design.
A Practical Establishment Sequence
Immediately After Planting
- Water each plant deeply enough to wet the root ball and settle soil around it.
- Confirm that crowns and trunk flares remain above mulch.
- Check that mulch does not block the inlet, outlet, overflow route, or check dams.
- Photograph or record the planting layout so desirable plants can be identified later.
- Verify that temporary irrigation reaches the bottom, side slopes, and upper edge as intended.
During the First Growing Season
- Check root-zone moisture during dry periods and after irrigation changes.
- Remove weeds before they seed or cover young plants.
- Inspect after storms for erosion, sediment, mulch movement, and blocked flow paths.
- Replace failed plants when seasonal conditions support replanting.
- Record repeated failures by location and species rather than treating each loss as an isolated event.
As Roots Expand
- Increase the interval between irrigations while checking plant response.
- Water deeply enough to encourage roots beyond the original planting hole.
- Reduce mulch additions as plant cover closes exposed soil, unless the approved maintenance plan calls for continued mulching.
- Thin, divide, or reposition plants only when crowding or moisture mismatch becomes clear.
The transition should be gradual. Turning irrigation off after a wet week can stress plants if the following weather becomes hot and dry. Continuing frequent shallow watering for too long can keep roots near the surface.
Common Establishment Mistakes
- Using one calendar for every plant. Moisture differs between the inlet, bottom, slopes, and rim.
- Assuming stormwater reaches every root zone. Runoff may bypass the bed or remain concentrated in one area.
- Adding mulch without checking grade. Extra material can reduce ponding space and bury plants.
- Watering the surface lightly. Wet mulch does not show that the root ball received water.
- Ignoring the contributing drainage area. Bare soil upstream can refill the bioswale with sediment after each storm.
- Replacing plants without studying the failure pattern. The replacement may fail for the same reason.
- Applying fertilizer as a routine response. Nutrient additions may not correct drainage, compaction, planting depth, or species mismatch and may be restricted by the facility plan.
- Letting maintenance traffic compact the bed. Repeated foot or equipment pressure can reduce infiltration and damage roots.
When Early Care Becomes a Drainage Issue
Some establishment problems are not horticultural. They show that the bioswale is receiving water incorrectly or is not draining as designed.
Request a site review when runoff bypasses the bioswale, erosion keeps returning, an inlet sends a damaging jet across the bed, the outlet remains blocked, an underdrain does not appear to function, or ponded water persists beyond the drainage target set for the project. The same applies when seepage appears near a foundation, retaining wall, pavement base, utility, or neighboring property.
Public, roadside, parking-lot, and permitted systems may have inspection records, approved planting plans, mulch specifications, and maintenance triggers that must be followed. Changes to grade, soil media, overflow structures, underdrains, or liners should be reviewed by the responsible designer, owner, or local stormwater authority.
Site Planning Note: More irrigation will not solve poor drainage, blocked outlets, compacted media, or incorrect grading. Correct the water movement before repeated plant replacement.
Frequently Asked Questions
How Often Should New Bioswale Plants Be Watered?
Watering frequency depends on plant size, soil texture, weather, mulch, sun exposure, and how much runoff reaches each zone. Check moisture around the roots and water before the root ball becomes fully dry. Reduce watering gradually as roots spread.
Does Rain Mean Irrigation Can Be Skipped?
Not in every case. Light rain may wet only the surface, and runoff may bypass part of the bioswale. Check the root zone and confirm that water entered the facility before skipping irrigation.
What Mulch Works Best in a Bioswale?
Use the material named in the approved design or local maintenance standard where one exists. In many planted systems, a coarse or interlocking organic mulch is chosen because it is less likely to float than lightweight decorative pieces. It should remain clear of plant crowns and drainage openings.
Should Mulch Cover the Entire Bottom?
That depends on the design and plant community. Mulch can protect exposed soil during establishment, but it should not cover stone forebays, outlet structures, check dams, dense groundcover, or areas intended to use another surface treatment.
When Are Bioswale Plants Considered Established?
Establishment is better judged by plant condition than by a single date. Plants should show new growth, remain stable in the soil, recover from normal wet-and-dry cycles, and need less supplemental irrigation. Woody plants may take longer than small herbaceous plants.
Why Do Replacement Plants Keep Dying in the Same Spot?
Repeated loss in one area can point to excessive ponding, fast drying, sediment burial, salt exposure, concentrated flow, compacted soil, shade, planting depth, or a species that does not fit that moisture zone. Check the site pattern before installing the same plant again.