A bioswale usually gives early warning before its drainage function declines. Water begins to enter through a narrower path, sediment builds at the inlet, plants thin in the wettest zone, or a small eroded groove becomes deeper after each storm. Regular bioswale maintenance focuses on finding these changes early, keeping the flow path open, and protecting the soil and vegetation that slow and filter stormwater runoff.
Maintenance is not only landscape care. It is also a hydraulic inspection. The inlet, channel, soil surface, plants, check dams, outlet, overflow route, and any underdrain need to work as one connected system. A bioswale can look tidy while water bypasses it, and it can look seasonally dormant while still functioning as intended.
A Practical Bioswale Maintenance Schedule
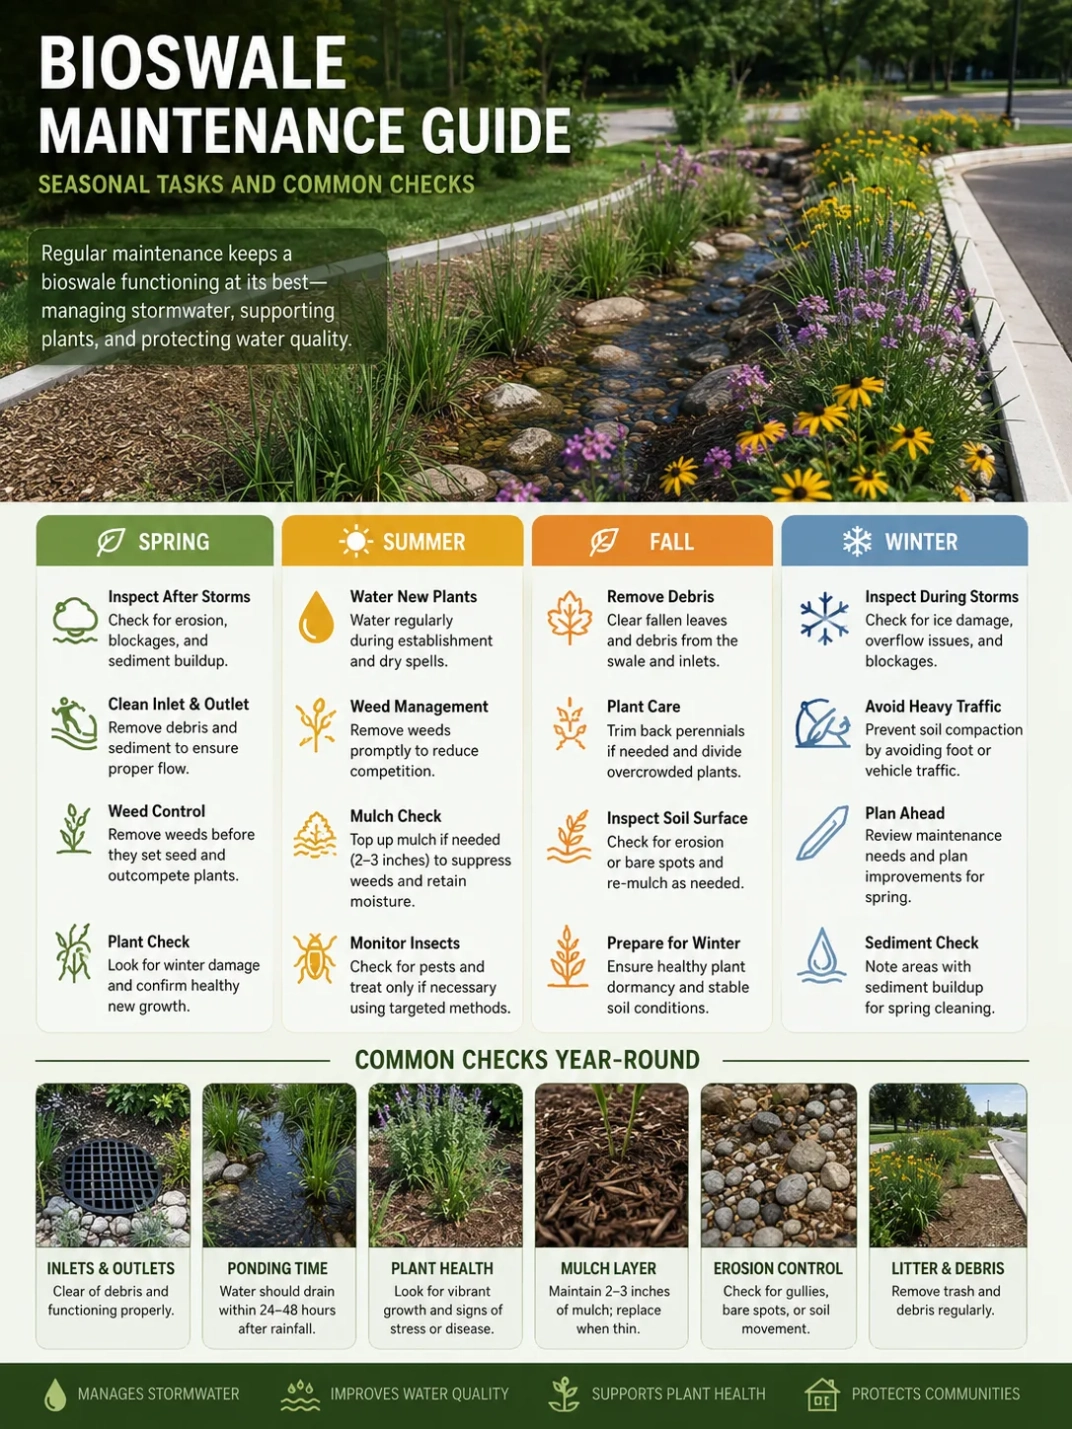
No single calendar fits every site. Rainfall pattern, runoff source, plant type, soil media, public use, road sediment, irrigation, snowmelt, and local inspection rules can change the workload. The table below provides a useful starting rhythm. A site-specific operation and maintenance plan should take priority where one exists.
| Timing | Main Checks | Typical Actions |
|---|---|---|
| After a strong storm | Inlet flow, bypassing, erosion, displaced mulch, outlet condition, overflow route | Remove obstructions, reset loose surface material, document scour or unusual ponding |
| During plant establishment | Soil moisture, plant stress, weeds, washout, bare areas | Water as needed, replace failed plants, stabilize exposed soil, control weeds before seed set |
| Monthly or during routine grounds visits | Litter, sediment, invasive plants, mowing damage, blocked curb cuts | Remove debris, hand-weed, trim only where needed, keep access points visible |
| Spring or start of the wet season | Winter damage, snowmelt erosion, inlet deposits, plant survival, soil settlement | Clear flow paths, repair small eroded areas, replant gaps, inspect structures |
| Summer or dry season | Drought stress, irrigation coverage, compaction, weeds, mulch movement | Water establishing plants, adjust irrigation, loosen only approved surface areas, replenish mulch where used |
| Autumn or before heavy rains | Leaf buildup, dead stems, sediment at pretreatment areas, outlet capacity | Remove material that could block flow, retain useful plant cover, prepare the inlet and overflow route |
| Winter or dormant season | Ice effects, snow storage, salt and grit loading, damaged markers or curbs | Keep plowed snow and sediment from sealing the inlet, protect structures, inspect after thaw |
| Annual review | Drainage behavior, plant coverage, repeated repair locations, maintenance records | Compare current conditions with the design intent and arrange technical review where performance has changed |
The most useful inspection happens while water is moving. A dry-weather visit can reveal sediment, weeds, or damage, but a storm visit shows whether runoff actually enters the bioswale, spreads across the intended flow path, and leaves through the correct outlet or overflow.
What to Check from Inlet to Outlet
1. Runoff Source and Inlet
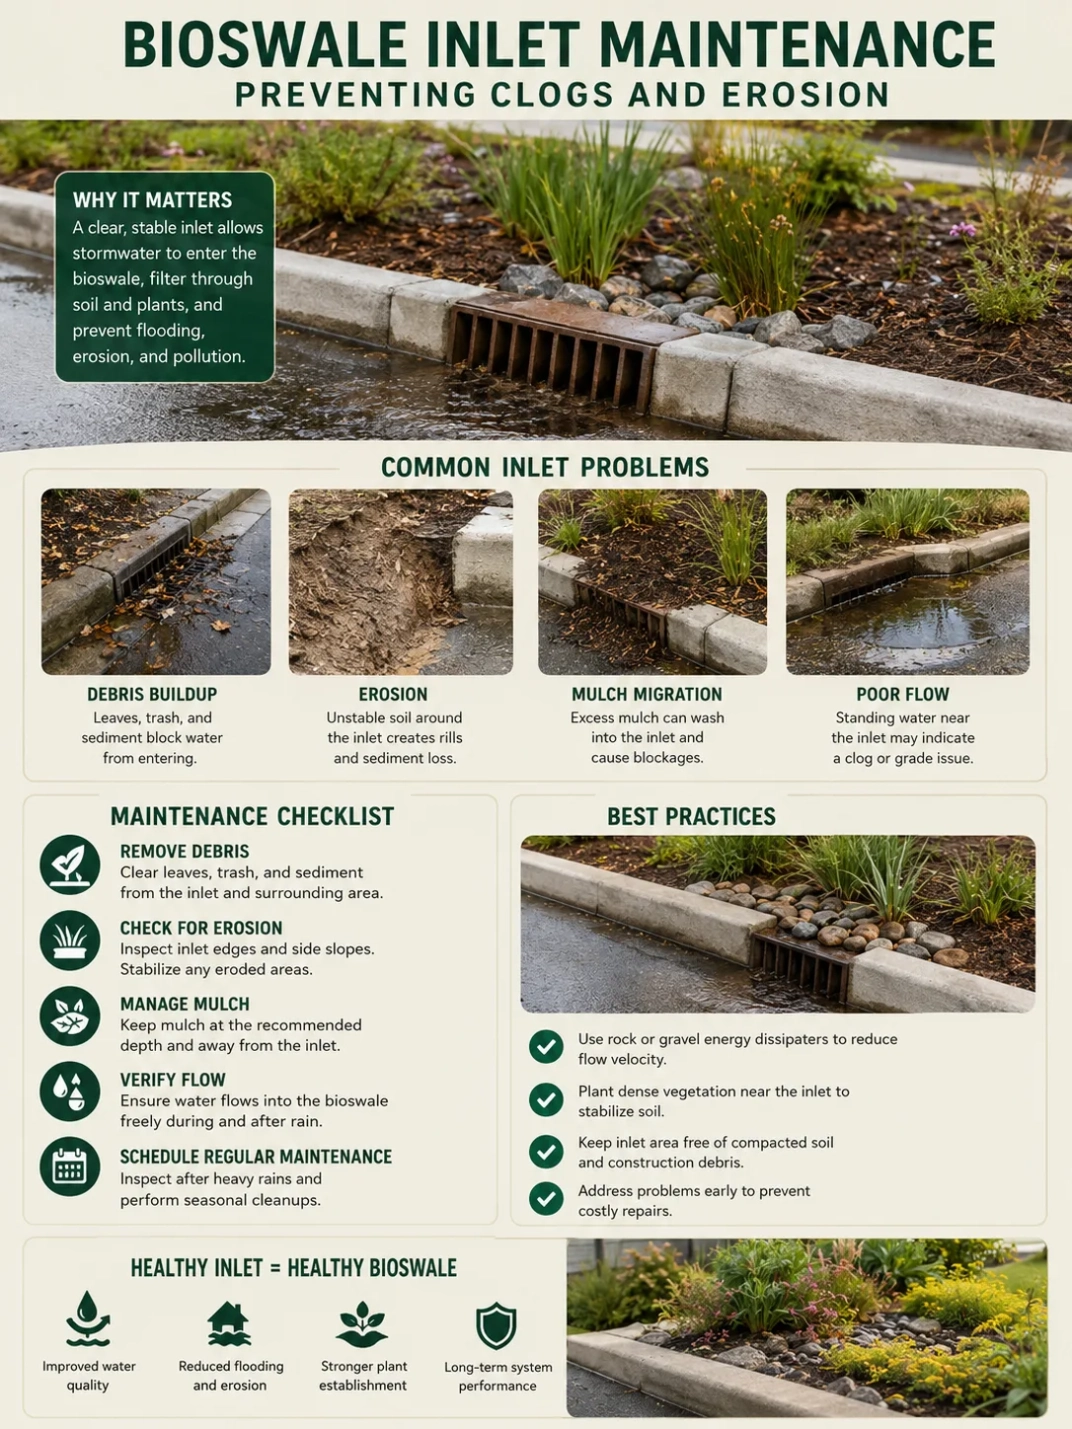
Start upstream. Look at the roof drain, curb line, driveway edge, parking lot, road shoulder, or other impervious surface that sends water to the bioswale. New pavement repairs, landscape edging, settled pavers, piled leaves, or wheel ruts can redirect runoff before it reaches the inlet.
- Confirm that runoff reaches the intended curb cut, level spreader, pipe, or open entry.
- Remove litter, leaves, gravel, and deposited sediment that narrow the opening.
- Check for scour where concentrated water enters.
- Look for water bypassing the inlet and continuing toward a drain, building, walkway, or neighboring area.
- Inspect any stone apron or pretreatment strip for displacement or burial.
A small sediment wedge at the inlet is common because flow slows there. It becomes a maintenance issue when it raises the surface, blocks the opening, buries plants, or redirects water around the bioswale.
2. Flow Path Through the Channel
The channel should carry shallow flow without developing a narrow, fast-moving groove. Inspect the centerline, side slopes, plant stems, mulch, and any check dams for evidence that water has cut a preferred path.
Channelization reduces contact between runoff, vegetation, and soil media. Early signs include exposed roots, a thin line of bare soil, displaced mulch, or sediment deposited in a narrow band. Small repairs may involve restoring surface cover and redirecting flow across a broader area. Repeated or deep erosion can point to a grading, inlet-energy, or flow-volume problem rather than a simple landscape defect.
3. Check Dams and Grade Controls
Where a bioswale uses check dams, inspect both the upstream and downstream faces. Water may be intended to pond briefly behind the structure, but it should not cut around the ends or undermine the base.
- Remove debris that blocks a designed notch or low point.
- Look for scour below the structure.
- Check whether stones, timber, soil, or manufactured components have shifted.
- Confirm that flow is not escaping around a side slope.
- Note sediment depth upstream if storage space is being lost.
Do not raise, lower, or reshape a grade-control feature without checking the design intent. A minor-looking change can alter ponding depth, overflow elevation, and flow distribution.
4. Outlet, Overflow, and Underdrain
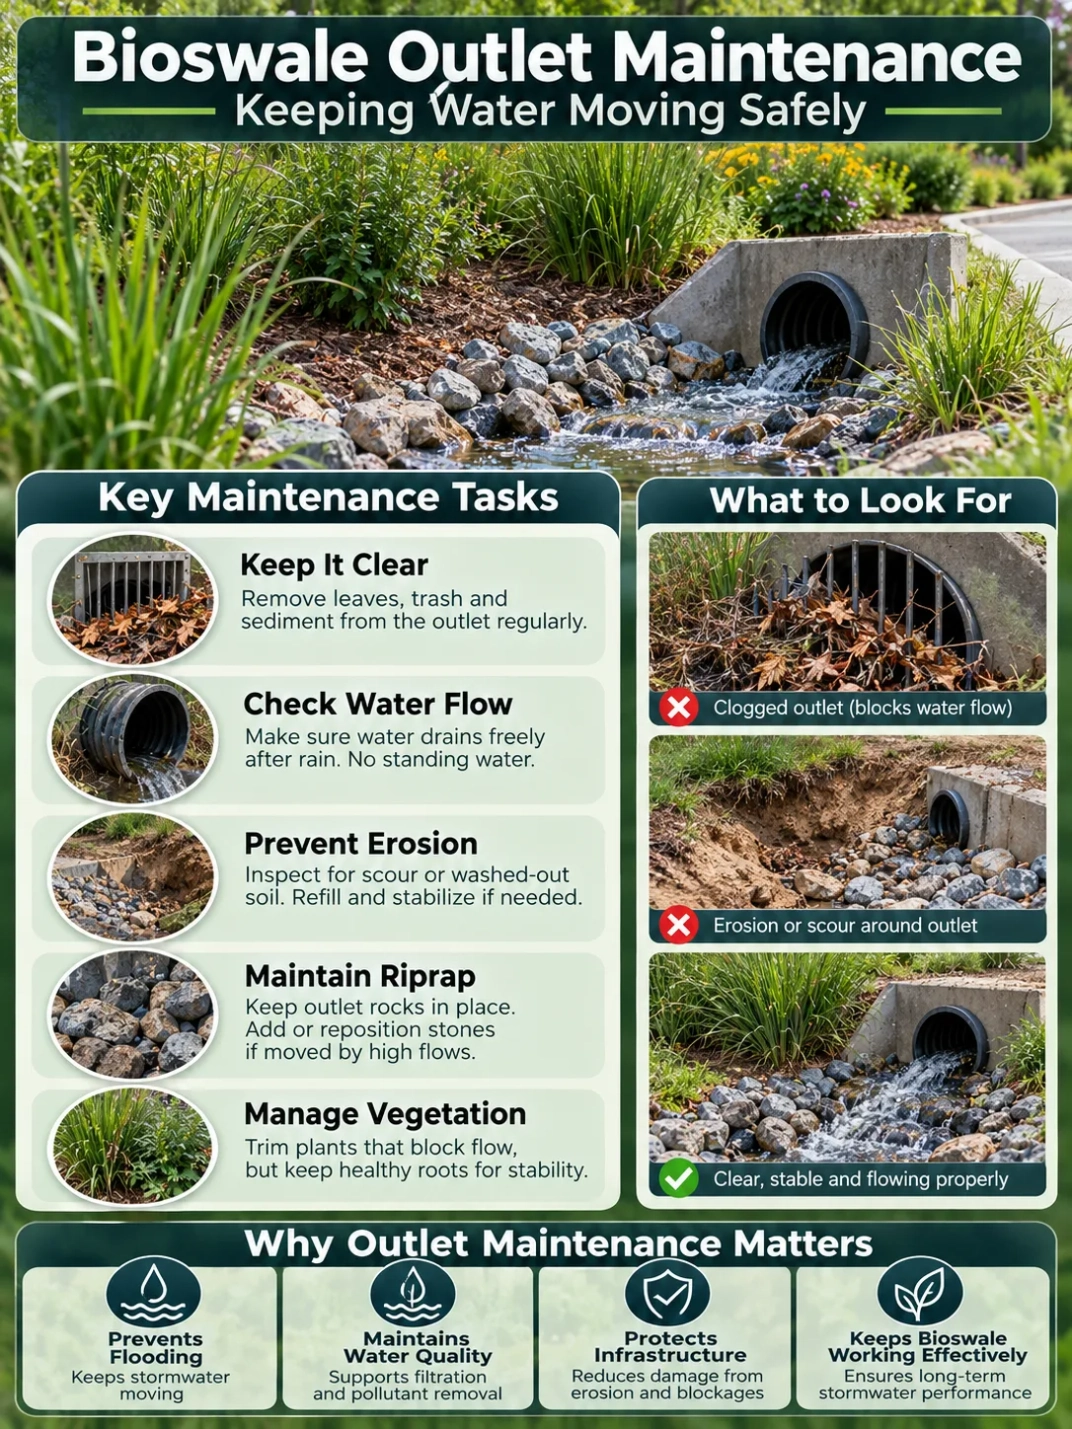
The downstream end deserves the same attention as the inlet. An outlet blocked by leaves or sediment can cause water to remain longer than planned. An eroded outlet can send concentrated flow onto a slope, path, or planting area.
- Keep outlet grates, pipes, stone aprons, and overflow openings clear.
- Check for settled soil around structures.
- Look for staining, debris lines, or flattened plants that show where high water traveled.
- Inspect accessible underdrain cleanouts or observation wells according to the maintenance plan.
- Confirm that the emergency overflow route remains open and has not been blocked by edging, stored materials, or new landscaping.
Drainage Note: Clearing visible debris is routine maintenance. Persistent ponding, recurring overflow, a buried underdrain outlet, or water appearing near structures may need review by a drainage professional familiar with the original design and local site conditions.
Sediment, Clogging, and Soil Surface Checks
Sediment is part of the job a bioswale performs. Runoff from roads, parking areas, driveways, construction zones, and bare soil can carry fine particles into the channel. The concern is not the presence of any sediment; it is whether deposits are changing elevation, covering plants, sealing the soil surface, or blocking flow.
Where Sediment Usually Collects
- At curb cuts and pipe inlets
- Behind check dams
- At abrupt changes in slope or width
- Around dense plant stems
- At the downstream end of a shallow ponding zone
- Where runoff enters from an unstabilized side slope
Remove sediment carefully so the underlying soil media is not excavated. Avoid smearing wet soil with heavy equipment or repeated foot traffic. The goal is to restore the intended surface elevation and flow path, not create a deeper trench.
How to Recognize Surface Clogging
A clogged surface may form a thin crust, remain slick after nearby soil has dried, or hold water in places that previously drained. Fine sediment can also fill gaps between mulch particles or form a dense layer around plant crowns.
Compare behavior over time. One slow-draining storm does not prove that the soil media has failed. Saturated ground, frozen soil, back-to-back storms, a blocked outlet, or unusually high inflow can produce similar symptoms. Repeated observations under ordinary conditions are more useful than a single snapshot.
Soil Compaction
Compaction can come from maintenance vehicles, mowing equipment, construction access, frequent foot traffic, or using the bioswale as a storage area. It reduces pore space and can restrict infiltration and root growth.
- Keep vehicles and heavy equipment outside the treatment area unless the maintenance plan provides an access route.
- Avoid working on wet soil when footprints or tires leave deep impressions.
- Use designated stepping areas for repeated inspections in public or commercial sites.
- Do not assume that tilling is an appropriate repair for engineered filter media; it can disturb layers, roots, utilities, and underdrains.
If compaction is widespread or water no longer moves through the soil as expected, testing and a site-specific repair plan may be needed.
Plant and Mulch Maintenance
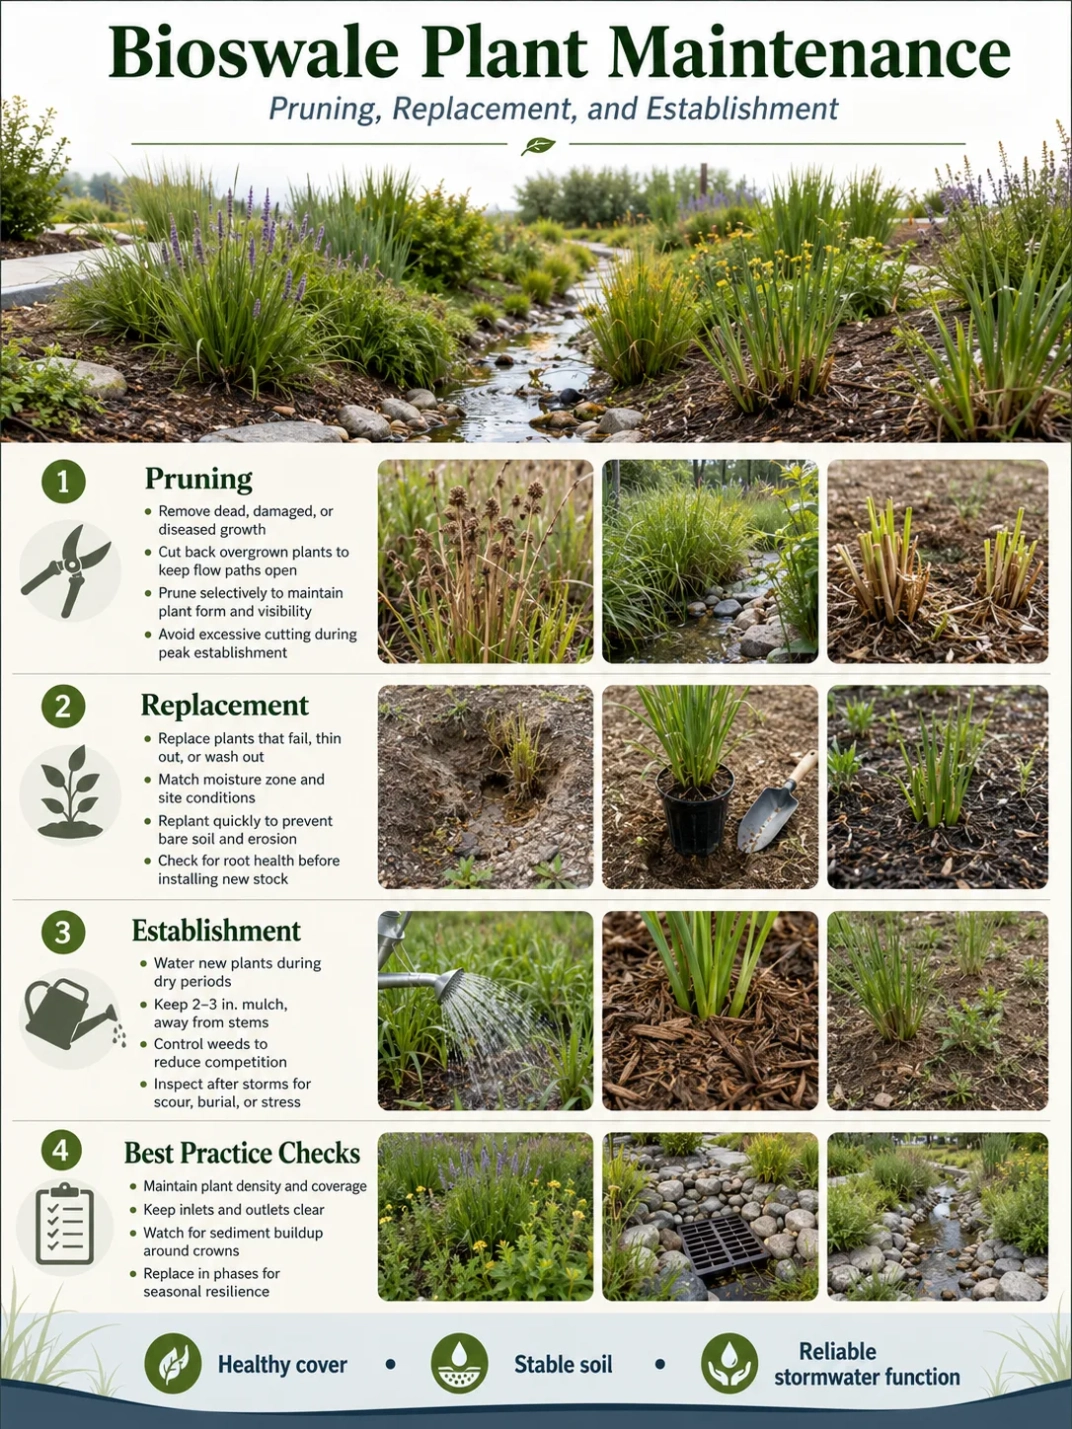
Plants support erosion control, surface roughness, root-zone structure, and evapotranspiration. Maintenance should preserve those functions rather than force every bioswale into the appearance of a clipped lawn.
Healthy, Dormant, or Failing?
Seasonal dormancy can resemble plant loss. Before replacing vegetation, check the expected growth cycle, stem condition, crown tissue, recent weather, and whether similar plants in the same moisture zone are responding in the same way.
| Observation | What It May Mean | Maintenance Response |
|---|---|---|
| Several plants fail near the inlet | Scour, burial by sediment, salt or pollutant loading, unsuitable wetness pattern | Correct the physical cause before replanting |
| Plants fail in the lowest zone | Longer ponding than expected, poor establishment, unsuitable moisture tolerance | Check drainage behavior and replace with locally suitable plants only after the cause is clear |
| Plants thin on side slopes | Drought stress, erosion, mowing, foot traffic, shallow soil | Stabilize soil, adjust care, and protect the slope from repeated disturbance |
| One species spreads through the channel | Aggressive growth or an invasive plant | Identify it before removal and follow local plant-management guidance |
| Tall stems fall across the inlet | Normal seasonal growth or delayed cutback | Trim enough to maintain flow while retaining useful cover and habitat structure where appropriate |
Weeding and Plant Replacement
Remove unwanted plants before they dominate the root zone or block inspection access. Hand removal is often suitable for small areas, especially near young bioswale plants. Confirm plant identity first; volunteer seedlings and dormant native species can be mistaken for weeds.
When replacing plants, match the moisture zone rather than filling gaps with one species across the entire swale. The inlet, channel bottom, side slope, and upper edge can experience different wet and dry cycles. Sun exposure, deicing salt, road spray, and local climate also shape plant suitability.
Mowing and Cutback
Grass swales may have a mowing plan, while bioswales planted with sedges, rushes, flowering perennials, or shrubs may need selective seasonal cutback instead. Cutting too low can expose soil, weaken plants, and reduce flow resistance. Leaving dense, collapsed material across an inlet can also obstruct water.
Use the planting plan where available. Keep mowing equipment away from saturated soil and mark structures, cleanouts, curb openings, and young woody plants before work begins.
Mulch
Some bioswales use mulch; others rely on dense herbaceous cover, stone, turf, or exposed filter media specified by the design. Where mulch is part of the system, inspect for bare spots, deep piles, floating, and movement into outlets.
- Redistribute small displaced areas rather than creating thick mounds.
- Keep mulch from burying plant crowns and inlet openings.
- Remove contaminated or heavily sedimented material when called for by the maintenance plan.
- Use the specified mulch type where replacement is needed; lightweight material may float in active flow paths.
Seasonal Bioswale Tasks
Calendar seasons are less useful than site seasons. A Mediterranean climate may need preparation before winter rain. A humid climate may receive large summer storms. A cold region may focus on snow storage, freeze-thaw effects, and spring melt. Shift the tasks below to match the local runoff cycle.
Spring: Reopen the Flow Path
- Inspect after snowmelt or the first strong seasonal rains.
- Remove winter litter, road grit, and leaves from inlets and outlets.
- Look for frost movement, settlement, cracked curbs, and shifted check-dam material.
- Repair small bare or eroded areas before repeated storms enlarge them.
- Confirm which plants are dormant and which have failed.
- Check whether sediment from winter road treatment has formed a sealing layer.
Spring is also a useful time to compare elevations around curb cuts. Road resurfacing, new asphalt overlays, or accumulated sediment can leave the inlet higher than the gutter flow line.
Summer: Support Plants Without Hiding Drainage Problems
- Water new plants according to climate, soil moisture, and the establishment plan.
- Check irrigation emitters for leaks, overspray, and uneven coverage.
- Control weeds before they produce seed.
- Inspect dry soil for cracks, animal disturbance, compaction, or exposed underdrain components.
- Keep maintenance access from becoming a worn drainage shortcut.
Routine irrigation should not keep the lowest zone constantly wet unless that condition is part of the design. Wet soil during dry weather may indicate a leaking irrigation line, an upstream water source, or a drainage restriction.
Autumn: Prepare for Leaves and Higher Runoff
- Clear curb cuts, grates, overflow openings, and pretreatment areas before forecast wet periods.
- Remove leaf mats that seal the soil surface or redirect water.
- Retain plant stems where they do not block flow and where the planting plan supports seasonal cover.
- Stabilize bare soil before long wet periods.
- Document low areas where sediment removal may be needed.
Leaves within a planted channel are not automatically a defect. The maintenance decision depends on depth, location, and whether the material blocks water, smothers plants, or forms a dense layer over the soil media.
Winter: Protect Inlets, Structures, and Soil
- Avoid piling plowed snow directly over curb openings, overflow routes, or fragile shrubs.
- Watch for road grit and deicing material entering from adjacent pavement.
- Keep markers visible so snow-removal crews can avoid check dams, cleanouts, and planted edges.
- Inspect after thaw for scour, displaced stone, and blocked outlets.
- Delay soil work when the surface is frozen, saturated, or easily compacted.
Maintenance Note: A short post-storm visit often has more value than a long inspection months later. Photograph the inlet, deepest ponding area, check dams, outlet, and any repair location from the same viewpoints each time. The record can reveal gradual sediment rise, plant loss, or a changing flow path.
Common Problems and What They Usually Indicate
| Symptom | Possible Causes | First Checks |
|---|---|---|
| Water bypasses the bioswale | Blocked or elevated inlet, changed pavement grade, sediment wedge, poor flow alignment | Trace runoff from the source to the inlet during rain |
| Water remains much longer than usual | Surface clogging, saturated native soil, blocked outlet, underdrain restriction, changed inflow | Inspect inlet and outlet, compare recent rainfall, review repeated observations |
| A narrow groove forms | Concentrated inflow, steep local grade, sparse vegetation, displaced check dam | Find where flow first concentrates and whether grade control is intact |
| Plants repeatedly fail in one area | Wrong moisture tolerance, burial, scour, salt exposure, compaction, altered ponding | Correct the site condition before replacing plants again |
| Mulch leaves the channel | High velocity, unsuitable mulch, excessive depth, concentrated flow | Check inlet energy, flow distribution, and specified surface treatment |
| Sediment returns soon after removal | Unstable upstream soil, heavy road loading, missing pretreatment, construction activity | Inspect the contributing drainage area, not only the bioswale |
| Outlet area erodes | Concentrated discharge, displaced apron, blocked downstream route, altered grade | Keep people away from unstable ground and arrange design review if erosion is active or recurring |
Repeated repair at the same location is evidence, not bad luck. It often means the cause lies upstream, below the surface, or in the original grading. Record the pattern before rebuilding the same spot again.
Maintenance During the Establishment Period
A newly planted bioswale usually needs closer observation than an established one. Roots are not yet holding the soil, plant coverage is incomplete, and irrigation or rainfall can expose small grading defects.
- Check after early storms. Look for washed seed, floating mulch, buried plugs, and concentrated flow.
- Maintain even plant establishment. Replace losses where gaps expose soil or interrupt the intended planting pattern.
- Control weeds early. Young bioswale plants compete poorly with fast-growing unwanted species.
- Water based on soil moisture. A fixed schedule may overwater the low zone while leaving side slopes dry.
- Protect the soil. Keep workers, pets, vehicles, and stored materials from compacting or disturbing the channel.
- Update the plant map. Record substitutions and replacements so future maintenance crews know what should be present.
Plant loss across many zones, broad settlement, deep erosion, or widespread standing water may point to a construction or design issue. Replanting alone is unlikely to correct it.
Residential, Roadside, and Public-Space Differences
Residential Bioswales
Residential systems often receive roof, driveway, or yard runoff. Checks should include downspout connections, splash blocks, foundation clearance, property slope, overflow direction, and changes made by later landscaping. Avoid routing overflow toward a building, neighboring property, septic area, or unstable slope. Local drainage rules may apply.
Roadside and Parking Lot Bioswales
These sites can receive more litter, grit, tire-carried sediment, deicing material, and concentrated curb flow. Inlet cleaning and pretreatment maintenance may be more frequent. Inspect for vehicle encroachment, damaged curbs, buried openings, and soil sealing near the pavement edge.
Public Landscapes
Public sites add foot traffic, visibility, accessibility, and maintenance coordination. Keep inspection access clear without creating a path through the treatment soil. Landscape crews, street crews, irrigation contractors, and stormwater staff should share the same maintenance boundaries and know which features are functional drainage components.
When Professional Review Is Appropriate
Routine litter removal, light weeding, minor replanting, and clearing an accessible inlet are ordinary maintenance tasks. Some conditions call for a closer technical review:
- Water repeatedly approaches buildings, roads, or pedestrian areas.
- Erosion is deep, active, or returning after repair.
- The outlet, overflow, underdrain, or check dams appear damaged or displaced.
- Ponding behavior changes across much of the bioswale.
- Soil media may need removal, replacement, or deep disturbance.
- Contaminated sediment, an unknown discharge, or an unusual odor is present.
- New construction or grading has changed the drainage area.
- The repair could affect utilities, property drainage, public infrastructure, or permit conditions.
A qualified stormwater, civil engineering, landscape architecture, soil, or drainage professional can help determine whether the issue comes from maintenance, changed site conditions, or the original design.
Keeping a Useful Maintenance Record
A simple record turns separate visits into a performance history. Include the date, recent weather, observed water level, sediment locations, plant losses, erosion, debris removed, repairs made, and follow-up needs. Add photographs taken from fixed points.
For larger sites, label each inlet, check dam, cleanout, and outlet on a plan. Record who is responsible for landscape tasks and who handles drainage structures. This prevents a blocked curb cut from being treated as someone else’s job and helps future crews understand why the planted depression is shaped the way it is.
Frequently Asked Questions
How Often Should a Bioswale Be Inspected?
Inspection frequency depends on the design, runoff source, climate, establishment stage, and local maintenance requirements. Visits after strong storms, seasonal checks, and routine grounds inspections provide a practical base. New systems and sites receiving road or parking lot runoff often need closer observation.
Is Standing Water in a Bioswale a Maintenance Problem?
Brief ponding may be part of the design. Water that remains far longer than the site’s normal drainage pattern, persists through dry weather, or appears in a new location deserves investigation. Check recent rainfall, the inlet, outlet, soil surface, underdrain components, and the design drainage window before choosing a repair.
Should All Leaves Be Removed from a Bioswale?
No. Scattered organic material may not interfere with function. Remove dense mats or piles that block inlets, cover outlets, smother plants, seal the soil surface, or redirect flow. The amount and location matter more than a perfectly clean appearance.
Can a Bioswale Be Mowed Like a Lawn?
Only when the planting design uses mowable turf or grasses and provides a mowing plan. Bioswales planted with sedges, rushes, perennials, or shrubs may need selective cutback instead. Mowing wet soil or cutting vegetation too low can damage plants and compact the treatment area.
What Should Be Done with Sediment Removed from a Bioswale?
Handling depends on the runoff source, the amount of sediment, local rules, and whether contamination is suspected. Sediment from a residential roof system is not the same as material collected beside a busy roadway or industrial area. Use the site maintenance plan and local disposal guidance, and seek professional advice when the material has unusual staining, odor, sheen, or an unknown origin.
Why Does the Same Part of the Bioswale Keep Eroding?
Recurring erosion often means water is entering too quickly, concentrating into a narrow path, bypassing a grade-control feature, or leaving through an unstable outlet. Repairing the bare soil without correcting the flow condition usually leads to another washout. Trace the water path during a storm and arrange technical review when erosion is deep or persistent.